My Sewing Room Tour!

When this post is published, I will still be in Italy, hopefully enjoying the sunshine and the mountains.  This is something a little different so that you don’t get sad and miss me… a tour of my sewing room!

IMG_1914

My sewing room is quite a small space, and does get quite dark so lighting is really important.  I have a great spotlight and diffuse light combo to help brighten up my desk, and I have tried to keep the colours fairly light and bright.  It is also filled with things to inspire me and so that I just enjoy being in the space.

IMG_1947

I have tried to keep the room as practical and user friendly as possible.  All the things that I am most likely to need as I sew I can reach from my chair.  In particular the shelf above my sewing machine contains useful odds and ends.  And don’t those button jars just look lovely!

IMG_1918

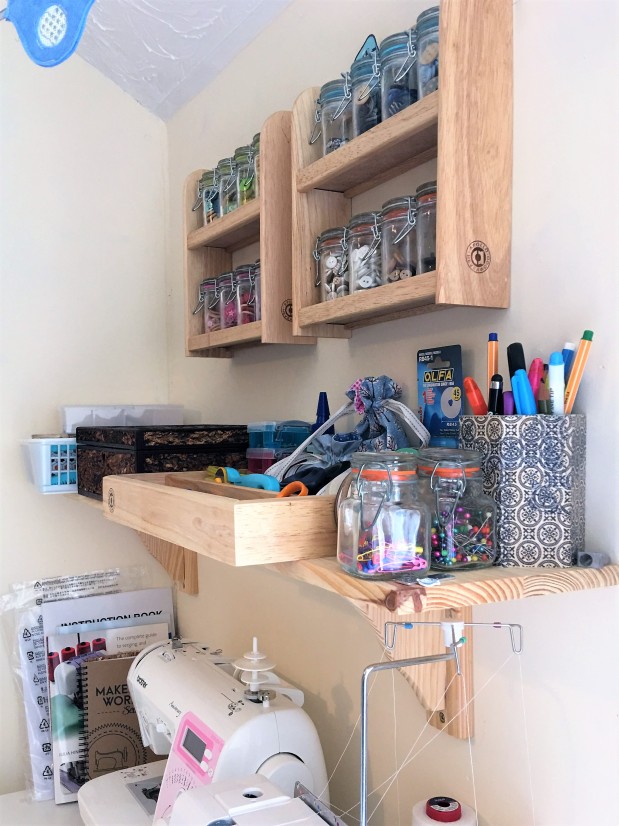
The beautiful wooden box is one that my grandma picked up for me in a charity shop, filled with sewing supplies and embroidery thread skeins.  Now I use it to keep all my elastics and fusible tapes neat and tidy.  This tray contains all my most essential tools and is perfectly within arms reach.

IMG_1946

The desk does have to be kept fairly tidy because it is also my cutting out space.  I have a couple of big cutting mats, and I usually use a rotary cutter to make pattern prep as easy as possible.  I keep my most essential reference books on the desk easy to grab, including my instruction manuals and Overlocker Technique Manual.  One of my favorite books though is the Maker’s Workbook, which does contain details of the fabrics, pattern alterations and my verdicts of all the projects that I have sewn this year.

IMG_1931

I am very fortunate to have enough space to keep my ironing board set up full time.  Makes pressing seams easy and convenient to do as I go along.  The unit in the corner contains a whole range of other craft items including knitting an wool, paper-craft and general stationary.

IMG_1926

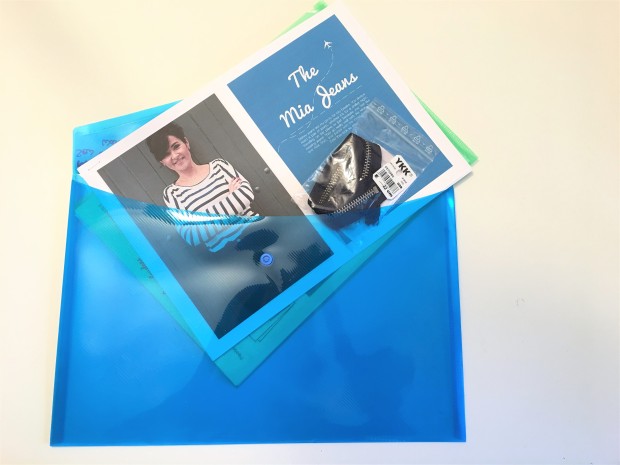
My fabric lives in these cubes/drawers which are from Ikea and the unit also serves as my pattern and reference book library.  You can see more about how I store my patterns in my post from a couple of weeks back.

IMG_1934

You have to love color co-ordination and beautiful threads!

IMG_1916

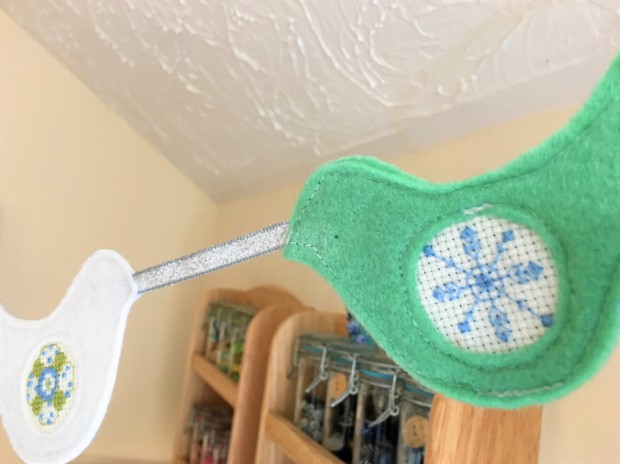
I used to do quite a bit of cross stitch, and these birds still make me smile.

IMG_1969

I’ve even been trying to be more intentional about my plans, and having them there on the wall for me to see the whole time is really useful.

IMG_1970

What do you think of my sewing space?  It is definitely my happy place, and exactly where I love to me!

Sew over it Silk Cami

By the time you are reading this I will be on a flight out to Italy with a suitcase full of last minute completed sewing!  I’m going to have quite a backlog of things to write up once I get back.  This is also a slightly belated post.  Even the pictures were taken a couple of months ago on a short trip to Swansea.

When Sew Over It was having one of their sales, I decided to get a printed copy of their Silk Cami as part of a fabric/pattern kit.  They make up small numbers of these kits with a suitable fabric for a few of their PDF only patterns, and if you hate the printing and sticking that a PDF pattern entails, this is one way to access a couple more of their designs!

IMG_2466.JPG
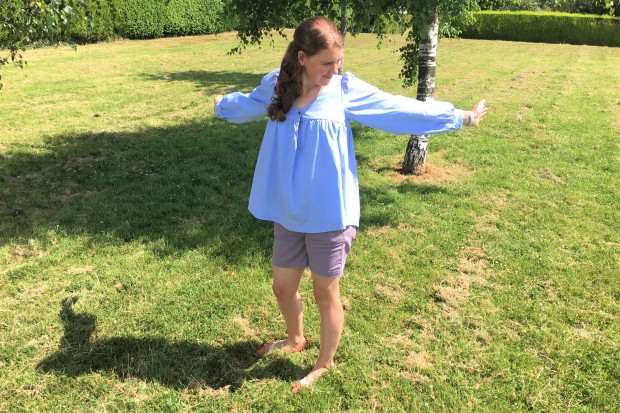
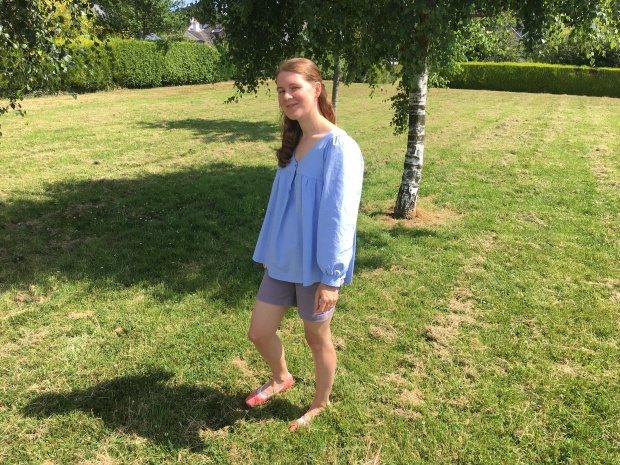
I decided not to use the fabric which came with the kit for my first attempt, because I wanted to check out the fit.  Instead I used the very last pieces of this cotton lawn (seen before in my Beausoleil Top and the English Tea Dress). You may also have spotted that I am wearing my handmade espadrilles in these pictures.  They still look so cool!

Photo 8.JPG

This is a very simple top.  There is no shaping or darts to deal with.  Just a front and back, and facings to finish the neckline and armholes.  Given it’s simple shape, I actually really like the fit of this and definitely have plans for more.

IMG_2510.JPG

About the only place that I’m not 100% happy is the back neckline which seems to be gaping a little.  I think I might take out a dart in this version, and then correct it in the pattern for future attempts.

IMG_2498.JPG

The only other little gripe if that my front facing doesn’t lie totally flat.  I’m not sure if that is a drafting error, or a tracing off the pattern error. (Probably more likely the latter.)  It means that for my next cami I will need to double check the pattern pieces too!

IMG_2474

I do have a slightly exiting plan to hack this at some point too with the Grainline Archer Popover variation to give a little cami with a popover button placket at the front.  I think that will look really cute when I get around to it!

IMG_2490

I do have plans for a few more of these once I have sorted out the slight neckline issues.  This one was always planned as a wearable toile before cutting into a couple of other lovely fabrics which have been earmarked of this pattern.

Wise Up Wednesdays- Your most important tool?

I think for most of us, one of the most important tools in our collection is the trusty seam ripper.  No matter how experienced or careful you are, mistakes happen!

IMG_2063.JPG

How many is too many though? The humble seam ripper is one of those tools which in my experience anyway seems to roll under you machine, get put down somewhere funny and disappear!  This is why I believe there can never be too many in your arsenal!  I usually have one in my sewing machine, one with my pins, another in my tray of tools and one floating around somewhere on the desk!

img_2059.jpg

You might be surprised to learn however, that not all seam rippers are created equal, nor do they last indefinitely.  Over time, the little cutting surface does blunt and if you have had yours for a while, it might be time to start thinking about replacing it.


I am particularly liking this clover unpicker at the moment.  Being blue, it does seem easier to find, and the slightly larger size also seems to help with that too!

IMG_2062

How often do you replace your tools?  Do you have any tricks to keep your most used tools where you can find them?

Dolomites-Italy1

As an aside, this is the last Wednesday post that I have planned for a little while. I thought that I would give myself a break over the summer, especially as I am off on holiday to Italy at the weekend.  Don’t worry though, my regular Sunday posts will continue, and I have a couple of things written and scheduled for while I am away too.  Hope you all have lovely holidays planned- I’m certainly looking forward to mine!

Valley Blouse

If you haven’t begun your Sew My Style project for July yet, learn from some of my difficulties and read this before you cut out the Valley Blouse!  Mine has come together ok, but not without some wrestling.  In particular, the keyhole section of the instructions could do with some further explanation.IMG_3140.JPG

There is a tutorial on the Califaye website to help with the sewing the keyhole, but I think that even before you get to that section, there is a potential pitfall, which you could avoid.  The cutting layouts show the ‘keyhole liner’ piece being cut on grain, but I would recommend cutting it on the bias. It is near impossible to get a piece of cotton with no stretch to conform neatly to a curve.  If it were cut on the bias, this would be much easier.  I ended up with a couple of small pleats at the middle of the liner when I tried to get all the edges enclosed.

IMG_3174.JPG

After my experience with the Basics Pocket Skirt, which was a little large, I decided to follow my instinct and cut the size small this time, even though my measurements put me in the medium.  This was definitely the right choice, because the fit is pretty much spot on.  There is enough ease to make it flowy, but without drowning me in fabric!

IMG_3150.JPG

This fabric is a cotton Swiss-dot, and is possibly slightly heavier weight than the pattern is intended for, because the gathers don’t drape as well as they could.  That said, it is very comfortable and perfect for summer.  The fabric is from Fabworks and is a lovely blue and grey combination, and at just £4/m it is another bargain!

IMG_3152

I used little hexagon shell buttons from my stash and made actual buttonholes.  I think that they are just great for setting of the simple pattern.

IMG_3128

In the pattern, it suggests that you use French seams for the sides and the back yoke which I did.  Just bear in mind, that with 1cm seam allowances, this does make your French seams very small and a little fiddly.

WP_20170715_20_21_14_Pro[2584]

I’m not sure about how full the sleeves are.  I might take the cuffs off, slim the sleeves down and then put the cuffs back on.  I do quite like them rolled up like this though.

IMG_3099

I followed the instructions fully this time and there are a couple of neat tricks for things like enclosing the front yoke seams.  This shouldn’t be too new to you if you have made a yoked shirt before, but take you time if not.  This is probably the most complex pattern from project sew my style so far, but it is still very manageable if you take it slow.

IMG_3094.JPG


Wise up Wednesdays- Why might you want a seam gauge?

This is one tool that I really cannot live without.  It is always close at hand when I am sewing and pressing because accuracy really does matter!

IMG_2065
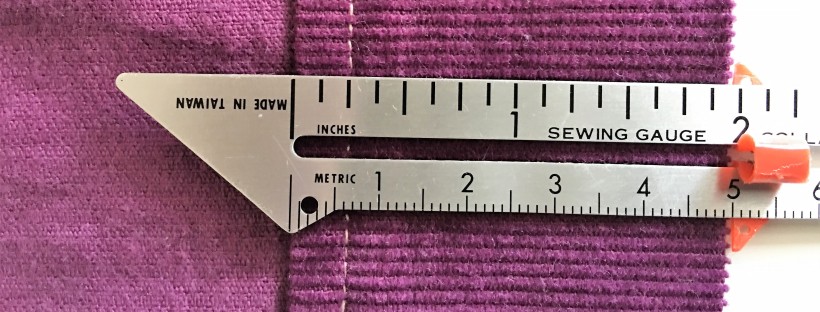
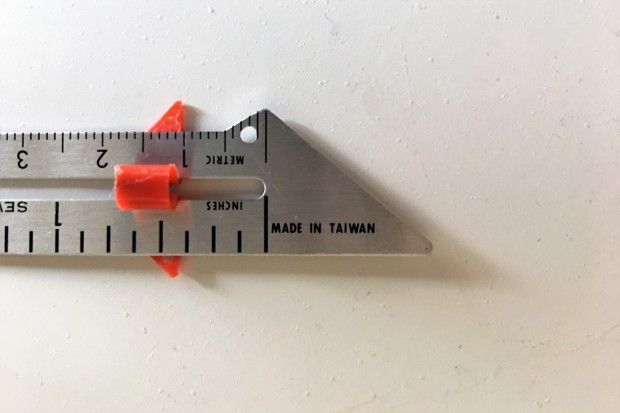
So why is this tool so much more convenient than a ruler, or tape measure?


The key is in that little red wedge.  This is able to slide up and down the gauge to a selected measurement. It is easy to move, but it does stay in position by itself.  This makes this such a handy tool for measuring seam allowances, needle position, and marking buttonholes.

Where it really comes into it’s own though is in pressing up hems.

IMG_2066

Because the little wedge stays in position, it is really easy to use to measure a section of hem as you press it into place.  You get a consistent measurement, and can just roll the hem into place.  The wedge marker just butts up against the folded edge of your fabric.  Perfect!

There are a couple of bonus useful features too.  The one I use most often is the point turner.

IMG_2071

This is a little rounded point, designed tor turning out corners without puncturing back through yous stitching.  I know there are lots of improvised alternatives such as knitting needles, or chopsticks, but I have found this little point great because it is already near at hand and it does turn out collar points beautifully.

Do you use a seam gauge in your sewing or do you measure another way?  Are there other tools that you couldn’t sew without?

#sewtogetherforsummer shirtdress

Hot on the heels of the Moneta Party has been another Instagram sewing community challenge.  This one is certainly very inclusive, giving you the option to sew any shirtdress from any pattern, and try to get them finished for the start of the summer.  I already had the Alex Shirtdress printed out and stuck together so this seemed like a great opportunity to get stuck in.

IMG_3005

The Alex dress is part of the Sew Over It ebook (My Capsule Wardrobe).  It is quite a loose fitting dress with no darts or gathers over the bust which did make it a quick and simple sew.  I found it a little too oversized, especially in this stiff cotton, and so made a few changes to help it feel more flattering.

IMG_3017.JPG

This fabric was very inexpensive, and the graduated criss-cross pattern did not really need any pattern matching.  It was from the textile centre and was a bargain at £1.99 a metre!  I even found some cute flower buttons in my stash, so this was a very cheap make.

IMG_3061

The first change that I made was to take a couple of inches out of the side seams at the waist, grading to nothing at the armscye and the hip.  With a belt, this was enough to give me some shaping, and I can now wear this both with or without a belt without feeling like I am wearing a tent!

IMG_3035

I also shortened the dropped back hem to the same slightly dipped hem as the front.  I didn’t think that it draped well enough to make the exaggerated dropped hem feature work.

IMG_3054.JPG

It is better, but I think there are a few more changes to make,  It still feels a little like a nightie or a uniform!  I think to improve it, I will take some fisheye darts out of the back to help remove some of the volume.  I think I might also shorten the dress 10cm too to make it a little more youthful.

IMG_3043

This dress was always intended to be a wearable toile.  I haven’t really worn shirtdresses before and I wasn’t sure it was a style that I was going to be comfortable with.  I think in it’s original guise, it wasn’t really me, but with a belt and once the back is a little more fitted, I think It will be a great summer staple.

How do I store my patterns?

Today is a slightly different type of post.  Life is busy and it can be tricky to make and photograph things every week.  This week I thought I would share my pattern storage and a couple that I am looking forward to making up in the near future.

IMG_1923

I have collected quite a range of patterns over the last couple of years, including books, magazines and paper or pdf patterns.  I still refer back to Love at First Stitch which was my first introduction to dressmaking, but I have also gathered a few other books as inspiration including From Stitch to Style and Gerties Ultimate Dress Book.

IMG_1921

These folders contain most of my patterns.  They are just A4 popper wallets in various colours.  As my pattern collection has grown, I have definitely needed to get more organised to make it easy to find what I want.  The colour coding is the first part of that.  Different types of clothing are in different coloured wallets and then they are divided up even further into box files.

IMG_1922

The box files were just plain brown cardboard files, but I have used decoupage in pretty coloured papers to make them unique and more attractive.  The labels are just letter stickers.

IMG_1976.JPG

Each envelope just has an ordinary address label stuck on so that I can see which is which without pulling them all out.  Inside is usually the pattern illustration, sizing chart and the pattern pieces themselves.  I don’t usually print the instructions.  They are just kept in a folder on my computer and I use the digital copy as needed to save paper.

IMG_1972

The great thing about the folders is that I can also use them to start collecting notions for a project in, such as zips, buttons or threads.  For smaller patterns like tops, I can even put the cut out fabric in the envelope with the pattern until I am ready to sew with it.

IMG_1971

I do have a couple of other places that patterns get stored.  A few smaller patterns or templates like baby booties, bibs and an eye mask are kept in this ring binder in ordinary plastic wallets.  The patterns in here are mostly single pieces or so small that they don’t need a whole popper wallet to themselves!

Finally, these wicker hampers contain most of my printed patterns, particularly any that come free with magazines.  I think this is one place that I do need to do a bit of a sort out soon, because I think I have some patterns here that I have no intention of using.  Maybe I can find a pattern swap so that they can be of use to someone else.

IMG_1929

I hope you enjoyed that glimpse into my sewing room and perhaps some of the things that are on my to sew list!  Let me know in the comments if you would like more posts about things like this.  How do you store your patterns?


Matt models again- Men’s Metro T-shirt

This won’t be the longest blog post today, because this is such a simple pattern and there isn’t much to say!  This is the Men’s Metro T-shirt by Liesl and Co.  Liesl and Co. is the adult pattern line associated with the pattern company Oliver and S.

IMG_2764

This pattern is about as simple as a jersey pattern gets.  It has just a front, back, sleeve and neckband.  If you have made t-shirts before, you will only need the instructions for the seam allowances!

IMG_2778

This is a size S, which is Matt normal t-shirt size.  The fabric however for this shirt is a little unconventional.  It started life as a Women’s maxi dress.  I found it in the charity shop for £1, and thought that the fabric was a steal!  It is a viscose elastane mix so very stretchy!

IMG_2790

The advantage of reusing something which is already hemmed, means that you can also reuse the hem.  The skirt did have a seam at the centre back, so I kept this in the t-shirt too, though it isn’t very visible.

IMG_2783

This was constructed mostly on my overlocker, with twin-needled hems on the sleeve.  Because this first one was so successful, I also made a couple of others with fabrics from Fabworks.  They have also come out great, as you can see below!

IMG_2788

One is in this space print fabric.  I think it is really cool.

IMG_2960IMG_2966

The other is in a lovely cotton interlock.  I thought this airforce blue colourway was great.  Both were just £5 a metre and this t-shirt needs only one metre so it seems pretty economical.

IMG_2972

I’m sure there will be many more of these t-shirts as Matt needs more.  Possibly also some long sleeved versions come the autumn.