I often enjoy having a slightly festive new dress to wear on Christmas morning, but I generally want it to be something that can fit into everyday life too. If it’s going to be comfortable on Christmas, jersey dresses are your friend! Mine also needed to accommodate feeding a small baby, and not be too complicated to construct in small doses while sleep deprived!
With all that in mind I chose the Sew Over It Georgie Dress which is a fairly new release. It has a mock wrap bodice which facilitates baby feeding, and a big circle skirt for me to fit Christmas lunch into! It can also be sewn in Ponte Roma which is lovely and well behaved for sewing when tired!
The Ponte came from an eBay store. I didn’t want to spend too much on the fabric because the big skirt is quite fabric hungry. This Ponte is really soft though so I’m pleased with the quality, though it has gone slightly bobbly after washing a couple of times. The bodice is lined with a lighter viscose jersey also from eBay.
Like lots of my recent makes, choosing a size was a bit tricky. I ended up cutting the size 12 based mostly on my bust measurements because the skirt is going to have plenty of ease over the hips anyway. I was a bit unsure if it might end up a bit too big in the shoulder, but it has worked out fine.
The pattern comes with a full length sleeve but I decided to shorten it to elbow length. Houses are often really hot at Christmas when filled with people and food cooking, so I thought the shorter sleeve would be more comfortable and practical. I just held the sleeve pattern piece up to myself to estimate where it needed to end.
There aren’t any pocket pieces included in this pattern, but I borrowed the pocket piece from the Collette Moneta Dress, and just worked out at what height I wanted the pockets to be in the skirt. A comfortable jersey dress like this definitely needs pockets!
One of the things that appealed to me in this pattern was that the neckline is stabilised with clear elastic to make sure that the wrap doesn’t gape. It means that I am feeling really good about wearing it because the bodice is well fitting and flattering without any worries about it flapping around. The elastic leaves enough stretch in the neckline that it can be pulled aside to breastfeed, and helps with the recovery too.
I always forget how long the hem is on a circle skirt! I did end up finishing this dress off almost at the last minute on the 23rd, just before all the festivities began.
I was so inspired by this pattern that I have purchased a heathered grey Ponte Roma to make a second dress. I think it will be a lovely practical outfit for the rest of the winter and into the spring. Hopefully I will get some sewing time soon to work on it!
I’ve decided to go back in time for a post today because I am working on a big project which I can’t share at the moment. These Ultimate Trousers were my very first pair of more structured and fitted trousers. Like my Carrie Trousers they were made supported by the Sew Over It online course ‘Ultimate guide to sewing and fitting trousers‘.
These are a bit of a style departure for me, but were a great confidence building exercise. I think I needed to make a pair to help me realise that trousers are just a series of seams and instructions like any other pattern, and nothing to be afraid of. It did definitely help though having the course to hold my hand through the process of sewing and fitting them though. I’m not sure I would have been brave enough to get started on my own!
The fabric is a khaki stretch twill from myfabrics.co.uk which I think is quite similar to this one which they have in lots of colours. With the spandex content it does recover very well, but it was still very easy to work with.
Unfortunately, while these were only really intended to be a wearable toile, they don’t actually get much wear. Not only is the colour not really one that I have in my wardrobe, the style feels a bit odd on me too. I’m not used to wearing trousers with a side zip, and tend to prefer a front fly. They are also a slightly cropped ankle length, which is also not usually my style.
Looking at them more objectively, I do actually like the way that they look so perhaps I should be giving them a second chance. They do have a fairly deep double fold hem, so I am wondering if I can let them down enough to be full length and a bit more wearable. If nothing else, they served the purpose of giving me the confidence to tackle other trouser projects afterwards such as the Ginger Jeans, so I’m not too sad that these weren’t perfect for me.
Last year I found it really helpful to think about which of my makes hit the mark, and which were less successful with my hits and misses, so I thought I would have another go this year too. I think most of my sewing has been fairly successful this year, though I have just done a wardrobe clear out, and a few handmade clothes did get the axe, so its certainly not perfect yet.
So here we go:
Top 5 Hits
Amber tops and Dress
I practically lived in my Amber tops during the last part of my pregnancy when it was hot and my bump was huge. Even since then, I must wear one at least 2-3 times a week because they are one of my most practical options for feeding in too. I particularly love my Amber dress because I think it looks fairly stylish and is so easy to just throw on, and my Amber hack layering tee also gets a lot of wear under shirts at the moment. I think the reason they have been so successful is because they suit my lifestyle as it is right now, not how I might wish it was. They are also made in good quality cotton jersey, so they have survived lots of washing and grabbing straight back out of the laundry pile!
Oslo Cardigan
This is another item of clothing that regularly gets taken straight from the clean washing pile to be put back on. When I first made it I wasn’t sure about the style on me and this was really intended as a wearable toile. However, the oversized nature of it has definitely been growing on me, and I love how easy it is to throw on. I would love to make another (possibly multiples) as again it fits my lifestyle right now really well.
Modified Toaster Sweater
I made this Toaster sweater right at the start of the year with some very special Atelier Brunette fabric. I’m pleased that I used this very special fabric in something which is comfortable and practical. I love that it fits over my Archer shirts, and the crew neck is more practical with a collar. I’m even really pleased with my decision to go for contrasting gold topstitching.
Ultimate Wrap Dress
This dress is another make that I love because I tweaked the pattern to create what I actually wanted. I hacked the sleeve into a little flutter sleeve, modified the cross-over to be a little higher and added an empire line seam to make it fit over the bump. I have worn it a bit since the arrival of baby too, though I think it might now need re-hemming to take out some of the extra length that I added to the front. I’m looking forward to being able to wear it again next summer.
Ringer Tee
I have made a mountain of these tops for Toby and as gifts, and I’m sure there will be more. I particularly like hacking them to have poppers at the neckline while he is small, but the pattern goes up to ages 5-6, so I’m sure I will make more as he grows. It’s a free pattern too, so what’s not to love!
Hits Conclusion
There were a couple of other patterns that I would have included, but I thought it might be cheating to include patterns that made it onto last year’s successes like the Mens Metro Tee and Grainline Archer because I knew before I got started that I would love them! I also thought that perhaps I couldn’t include the skirt that I am currently sewing, even though I’m pretty sure it will be a hit because I haven’t actually worn it yet! Another that came close was the Dandelion Dungarees because they have seen a lot of wear in the last few months and the popper hack definitely worked there too. I think the things that I have included demonstrate that I’m getting more confident at hacking patterns to get what I actually want from them, not just putting up with the parts that don’t work for me.
Top 5 Misses
Kinder Cardigan
Considering how much I love my Oslo cardigan, it seems a little strange that I’m not such a big fan of the Kinder Cardigan which is pretty similar. I think it is down to a couple of issues, one being that the pattern is possibly even a little more oversized than Oslo. The other being that the Ponte I made it in is definitely more structured so it ‘feels’ bigger. I did like some of the construction methods, and the pockets though, so I’m tempted to adopt some of these for my next Oslo cardigan attempt.
Blossom Dress
Technically this was made in 2017, but I was never really going to wear it until this year. I’m not sure if it is just because it is such a large expanse of single colour, but I didn’t really hit it off with this Blossom dress. I love the fabric, and the Anna Top that I squeezed out of the offcuts, but the dress hardly got worn. It probably doesn’t help that it looked a bit strange before I had a big enough bump, and by the time my bump was bigger the weather was warming up. This hasn’t survived a recent wardrobe clear out because it looks ridiculous again without a baby bump. Perhaps it would have been better as a top.
Lucia Top
A more recent make was this Lucia Top. It was a great way to kickstart sewing again being really simple, but I’m not a massive fan of the fabric. It’s a bit too shiny and ‘polyester’y. It has survive the wardrobe clear out, but only to see if I will wear it during the festive season when red and shiny seems more acceptable. If it doesn’t get worn it might have to go too.
Lily Top
There is nothing actually ‘wrong’ with this Lily Top, it just doesn’t get worn as often as I thought it might. I did wear it while I was pregnant, and I do sometimes wear it now to feed, but I wasn’t 100% pleased with the finishing techniques and there are some areas that I don’t think are going to be all that robust. It’s not a total fail, though I don’t think I would make the pattern again.
Miette Skirt
Again, there is nothing ‘wrong’ with this skirt, but I think it suffers from not suiting my changing body and style. I have been wearing a lot less that sits actually at my waist because I don’t find it that flattering at the moment. Perhaps that will change in the future and I will feel better wearing this skirt though. With hindsight, though the pockets are really useful, they just draw more attention to an area that I feel less confident in at the moment!
Misses Conclusion
I think several of these projects have suffered from the difficulties of guessing what sorts of things I was going to want to wear as my lifestyle and body have changed. Hopefully now that thigs are starting to settle down I can make more informed choices for next year and get more of them right!
This is actually the first thing that I managed to sew after the arrival of little Toby, but it’s been waiting for the collaboration post on Minerva crafts to go live. I decided to start off with something simple to ease into sewing in small doses- the Sew Over It Lucia. This was made with some soft touch jersey from Minerva Crafts, so you can see the full blog post over here.
I’m glad I chose something with so few pattern pieces. This has just 3- a front/back, the sleeve and the frill. Cutting out is my least favorite part of sewing so having just a couple of pieces let me get on with the sewing, rather than spending lots of time on the parts I don’t enjoy so much. I think the finished top will serve me well into the autumn and winter too.
It’s also great to be fitting some of my other clothes again! I’ve been wearing this top with my Moss skirt which will also be a good year long combo with tights and boots.
No new post today I’m afraid, but I do have a sneaky preview of a collaboration post coming on Tuesday. This is actually the first bit of sewing that I did after Toby was born, so I’m glad that I chose something really simple.
I do have some thoughts on sewing in a more limited time frame, so hopefully that will be a blog post on it’s way soon. I have to say though, it is so lovely to have some time to just be me, rather than ‘mum’.
If you saw my previous ‘in progress’ post, you will already know a bit about my planning and design process for this dress. Now I’m ready to show off the finished outfit, all ready for graduation!
I found the sewing up pretty easy having made my toile. You do have to be aware of the seam allowances though because there are a variety of different ones used in different areas. I’m glad that I added in a seam in the skirt to allow pockets in both side seams. I used the roomy pocket piece from the Helen’s Closet Winslow Culottes and they meant that I didn’t need to carry a bag.
I made the executive decision to have the button plackets the wrong way around. The colours and patterns on the facings just seemed to flow more logically across the front of the bodice than when I put them the right way around. I was also getting a little short of time when it came to putting in the buttons and buttonholes, and I didn’t really want to rush them so I went with snaps instead. These pretty pearly ones look quite like buttons anyway, and are nice and quick to undo to feed!
Even though I didn’t have loads of time to put this together, I did take some time over the finishing. I french seamed the bodice seams to keep all the layers of fabric neatly enclosed. I needed help to level the hem properly too because the waistline seems to be rising up slightly at the front. I think it could be partly because my bust is a bit bigger than in the past and could do with a bit more room. I had to remove about 2″ at the centre back skirt before it hung level all the way around.
Wearing this with my underskirt did work perfectly, and I will be able to wear the dress without it too next summer.
I’m hoping this will be a dress which will get lots of wear, both dressed up for a wedding or two, and for everyday. It’s probably getting too cold for many more outings this year though.
What circle skirt post could be complete without a bit of twirling. This skirt did feel great to wear. I would make another I think, though with my sewing time a bit limited it probably wont make it to the top of my sewing queue for a while.
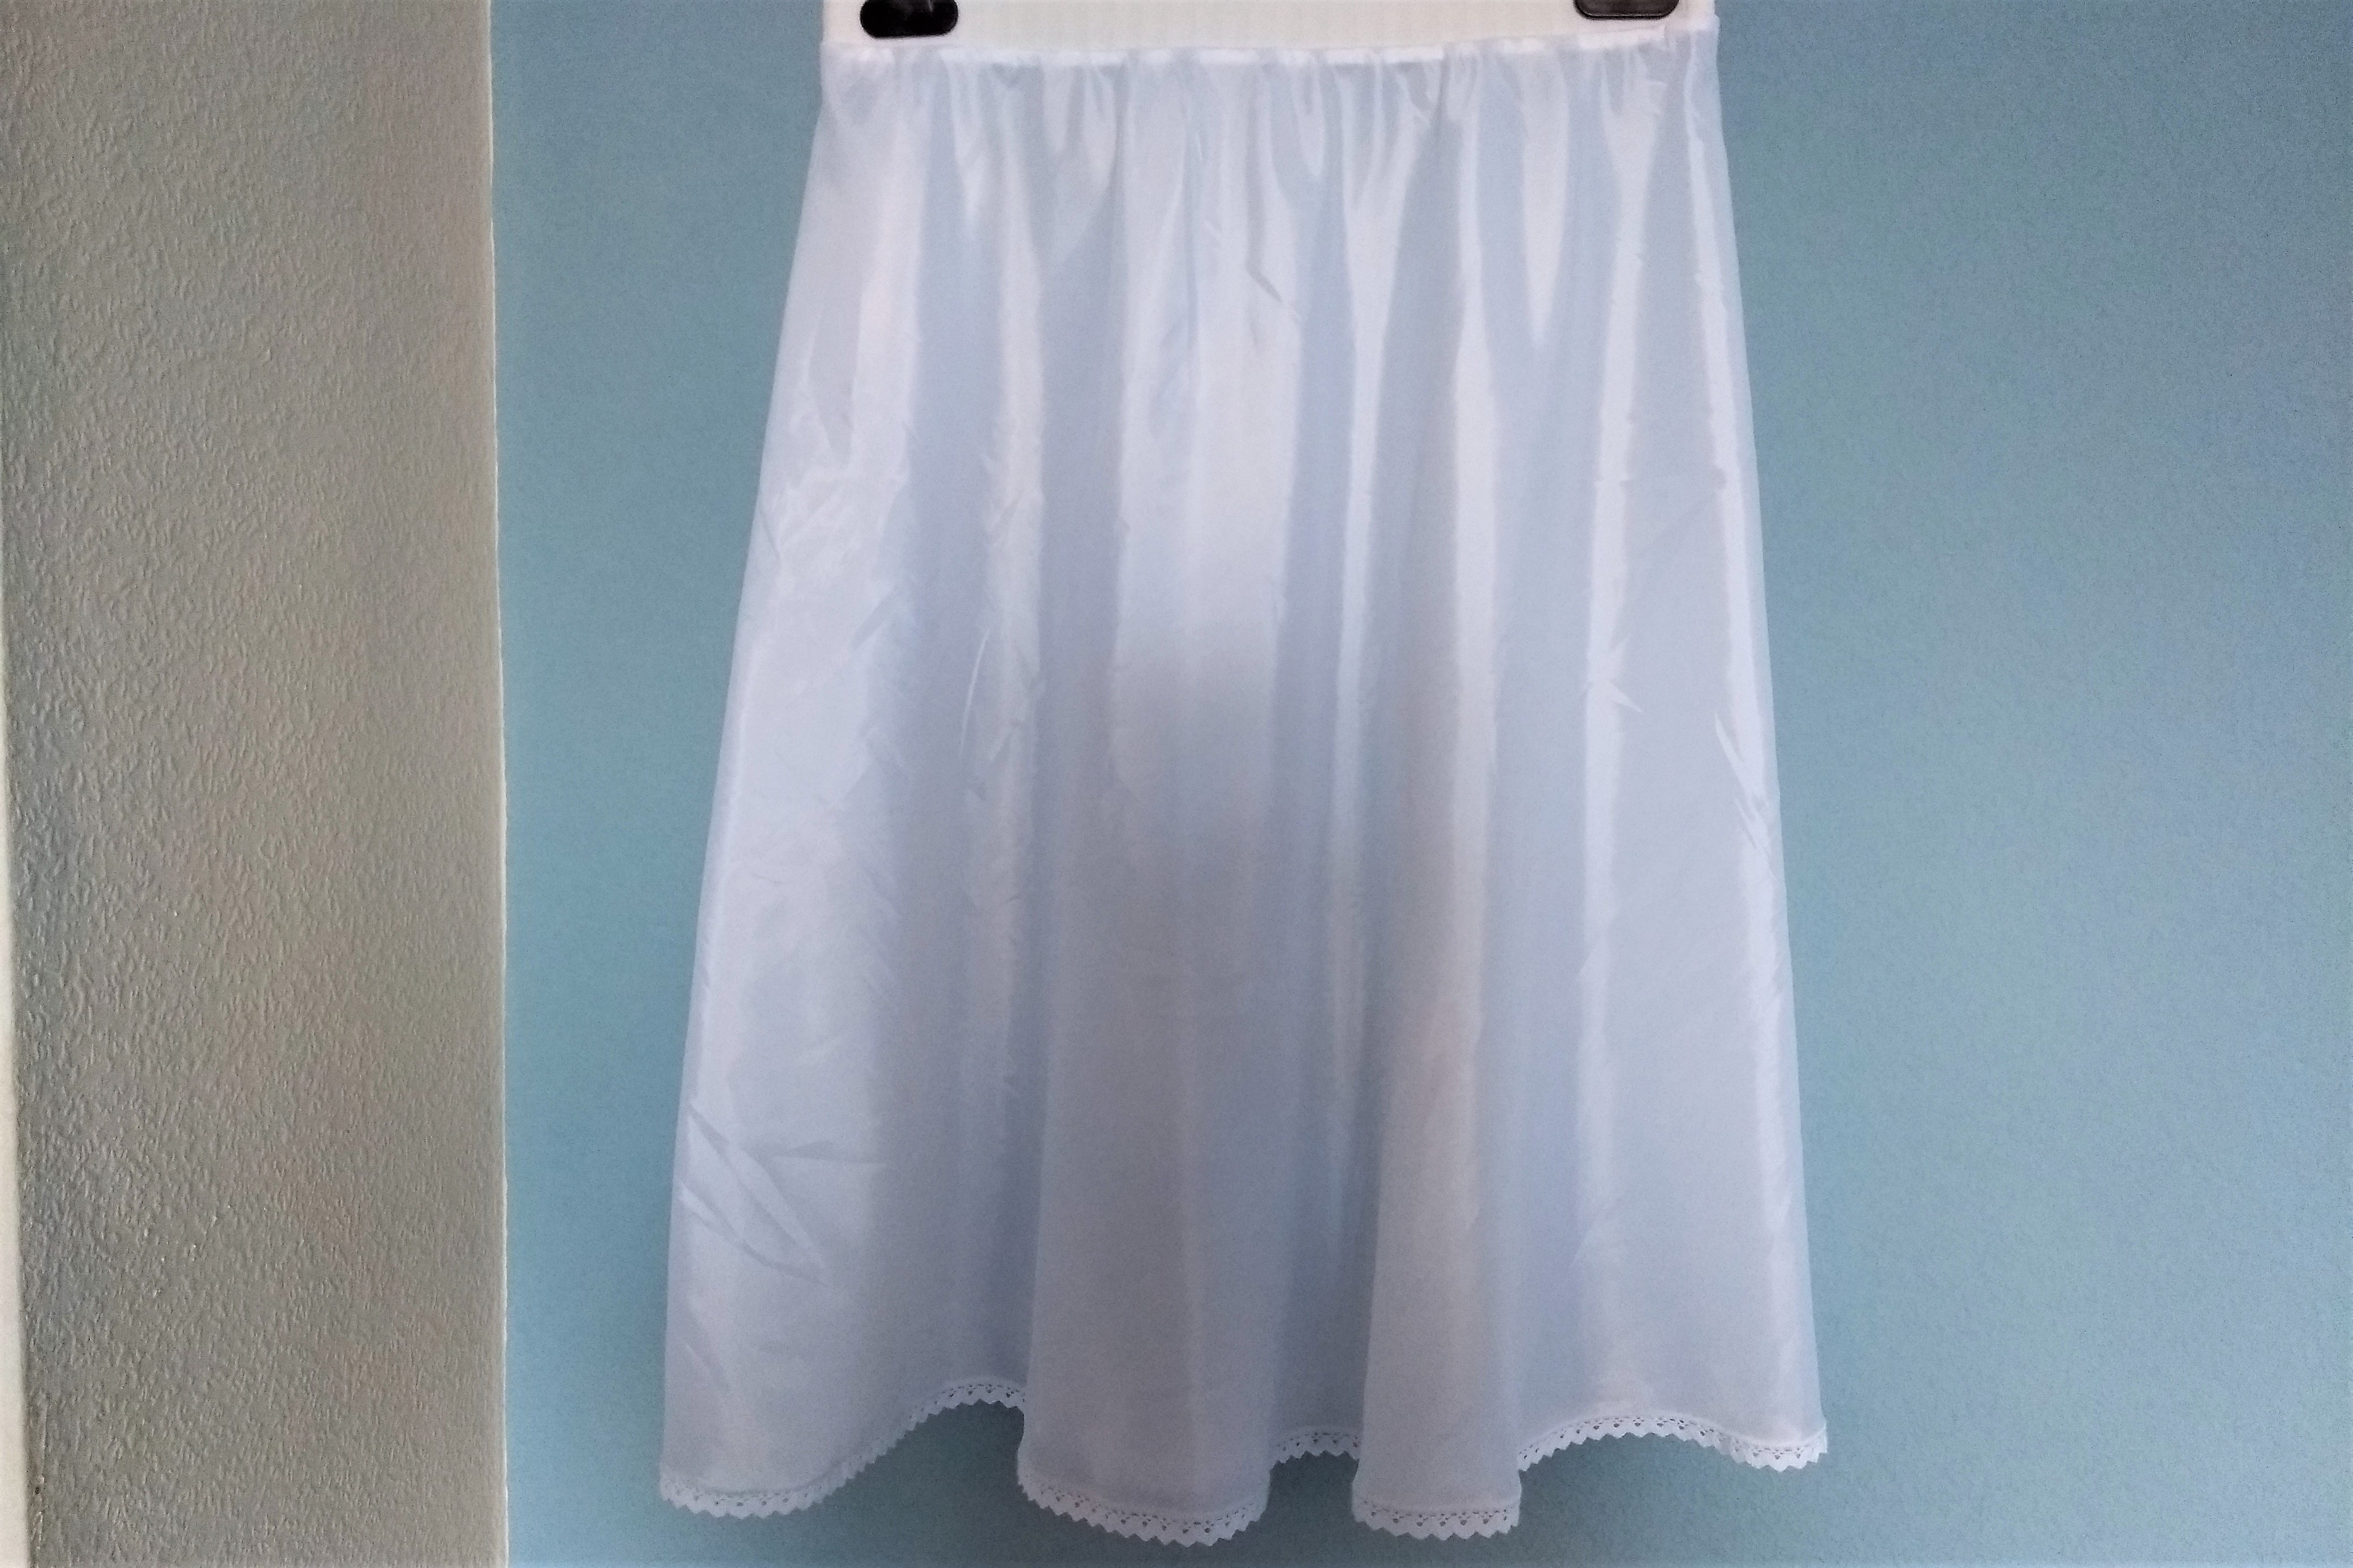
Hopefully by the time you are reading this, my penny dress will be finished and have been worn, but I thought I would share with you a quick sew that I put together to wear with it. I decided not to line the skirt of my penny dress, and it is just about opaque enough to wear as it is, but the weather has turned cooler, and for graduation I will be wearing tights so I didn’t want the cotton skirt sticking to them. My simple solution (which should also help me to stay warm) was to add a little slip or underskirt which will both add to the opacity and reduce the cling. This skirt came together in less than one evening. It helped that I had a couple of little tricks in mind to speed up the process. It is constructed almost entirely on the overlocker so the seams are sewn and finished at the same time. In fact the only time I needed to use my sewing machine was to sew the elastic waistband into a circle.
This skirt is a basic 1/4 circle skirt. I sized it large enough so that the waist would pull up past my hips which meant that I wouldn’t need any form of zip or closure. I used the classic ‘pencil on a string’ trick to draw it onto my fabric, meaning no pattern to draft or trace out, and with a bit of basic maths a skirt is born! (If you want to skip the maths, the By Hand London circle skirt calculator is great. Just make sure that you enter you hip measurement rather than your waist if you want to do it without a closure.)
I also tried out a new finishing trick for hemming. My Janome 6234XL can do a 2 two thread overlock which is great for adding a lace trim and tidying up the seamline. It was the first time I had actually used it for a project (the only other time was at an get to ‘know your overlocker’ class at the Exeter Sewing Machine Company which I would highly recommend). I was slightly surprised that my notes were sufficient to remind me what to do and how to get set up, but it turned out to be a very speedy way to achieve a hem (and we all know how huge a circle skirt hem can be!), which has the added bonus of being very attractive and decorative.
The waistband is just wide waistband elastic sewn into a circle, and then stretched to the same dimensions as the waist while it was sewn on. I did it straight on the overlocker again which seems far quicker than using the sewing machine. I think the whole thing probably took around an hour from cutting out to finishing, though it was done in a few small doses around baby feeds and dinner. Definitely one of my speediest conceived and executed projects!
It feels like might just be the last person to try sewing a Sew Over It Penny dress, but it’s the pattern that I have picked out to make my dress to wear to graduation. I have been planning this dress a while, and it is one of my make 9 plans so it feels good to be underway! I chose to make it in this beautiful floral cotton lawn from Minerva Crafts. They have a great selection, and I spent a long while narrowing it down and choosing.
It is slightly translucent, so I spent a long time deciding what to do about it. I’m still not 100% decided on what to do with the skirt (I’m going to wait and see if it is opaque enough by itself, but I chose to underline the bodice with white cotton lawn. I could have tried to do a proper lining, but with the construction of the Penny button placket (which is a bit unusual) I wasn’t quite sure how, and underlining doesn’t change any of the construction steps. I just had to hand sew the lining and the outer fabrics together before beginning the pattern construction steps. (It’s pretty similar to what I did to my wrap dress here.)
To make sure that the dress was going to fit properly I did make a toile first from a couple of old bedsheets. I didn’t bother with cutting and sewing the whole length of the skirt, so I just cut a shortened version. It did help me to work out the construction process before I start sewing the real thing which was really useful as I did get a bit confused for a while with the collar and facings. The method in the instructions does work, but did just baffle me for a while! It also meant that I could make a few fitting tweaks for my actual dress.
Because I’m still not back to my pre-baby shape and size, I thought it might be most flattering to have the waist seam and the elastic at my smallest point, which is still just below the bust, making my dress empire line. to do that, I’m removing 2.5cm from the bodice length. I’ve also decided to add in pockets to the skirt, so I cut the skirt as two pieces and added a seam allowance where it should be placed on the fold. If you are going to make your own clothes, you might as well have everything that you want!
That’s about as far as I have got so far. I’ve finished stitching the underlining to the main fabric, and I’m hoping the construction will go together smoothly, having ironed out the confusion with my toile. I have just over a week to get it put together so hopefully it will be enough! I want to do it properly though, and pay attention to the quality of construction. I don’t make many pretty dresses any more, so the ones I do need to be make to last.
This post comes slightly out of sequence because it has just gone live today on the Minerva Crafts blog. When I was offered some of their John Kaldor jersey to test I thought that this floral pattern was just beautiful and the drape of the fabric is great. At the time of sewing, my sewing time was a little limited because I had assignments to finish so I decided to combine a couple of different plans to make maximum use of my limited time.
This pattern is the maternity hack of the Sew Over It ultimate wrap dress, a pattern which was one of the first to make it onto this blog. Sew Over It provide instructions to hack the standard pattern pieces into an empire line so that is can be fitted around a bump. I also sized up to a 12, rather than the 8 I made before, as I’m hoping to be able to use this dress for nursing, and I’ve changed size at the bust too. The flutter sleeves are another hack, so look back to my post from Sunday to see what I did, and the tutorials that I found helpful.
This dress is also my entry for this years #sewtogetherforsummer community challenge, which involves making any wrap dress. I participated last year with my Alex shirtdress, and I’ve enjoyed seeing all the different patterns, inspiration and lovely dresses that have been made.
Anyway, to see the full blog post with all the construction details and final photo’s head over to the Minerva Crafts blog. I’m hoping to keep getting plenty of use out of this dress once baby arrives- hopefully it will be practical for throwing on when I don’t have time or energy to work out what to wear!
This week’s post will be arriving slightly later than normal because it is another collaboration with Minerva Crafts and is only due to publish on their website on Wednesday. I’ve been so exited to share this make though because I really am loving wearing it in this more summery weather, and I feel very sophisticated in it! Full details on the blog later this week, but for now I’ll show you the bit of pattern hacking that I did to create these lovely flutter sleeves.
This pattern started out as the Sew Over It Ultimate Wrap Dress, one of the first patterns that I blogged about. The dress has full length fitted sleeves- not very summery so I decided to make a few changes! Firstly, I worked out approximately how long I waned the sleeve to end up by holding it up against me, and I just traced off that much of the pattern. There are some great tutorials online, and I followed this one on craftsy, and also found this one on sewing pattern review helpful. You can see how the finished pattern piece looks very different to the initial one, but because none of the sleeve allowances or seam lengths have changed inserting it works exactly the same as before.
I wanted to keep the sleeve looking light and airy so I didn’t want a heavy hem weighing it down. It made it a great reason to use my overlocker’s rolled hem function which is much more dainty, and a very quick easy way of finishing a curve. I think I will be using this sleeve hack again over the summer- the sleeves are just so lovely. They aren’t restrictive or hot, but keep your shoulders covered when out in the sunshine! Pop back on Wednesday to see the other changes that I made to this pattern.