Planning a toddler capsule wardrobe

I’ve been thinking about sewing smarter rather than sewing more. Part of that has been to plan and cut in batches. The next phase is to plan stratecigally about what I sew, so I’ve decided to plan Toby clothing as a whole capsule for the next year or so. It’s a bit like the planning I did for Lottie before she was born, and the yellow bananas set, but on a bigger scale.

First, I wanted to think about the fabrics that I have ready to sew for Toby and how they might fit together. I came up with a bit of a colour scheme based on fabrics that I definitely wanted to use, and then looked for a colour palette that included them.

Now that I had a collection of colours, I went back to my fabric and pulled out any others that would fit in, including a few prints and lots of solids. I also looked out for some extras to fill in the gaps in a few fabric shops, because it seemed like a great excuse for a little fabric shopping!

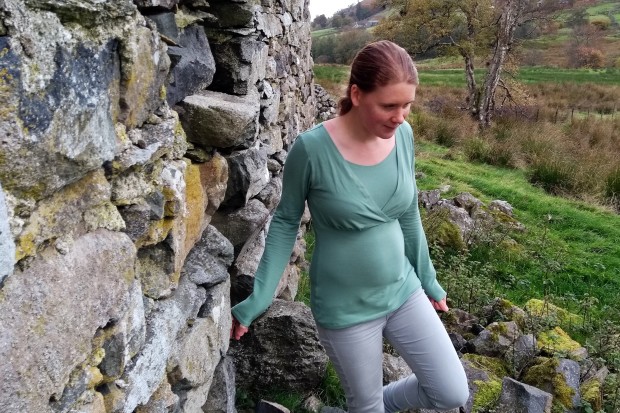
This is what I came up with. The fabrics are mostly knits of a mixture of different weights from t-shirt jersey to sweatshirting. Most of the clothes that I make Toby are stretchy because he wants to be able to move freely, though I think I might also pull in a few cotton or linen type fabrics too. I’m hoping that this capsule will be sufficient for approximately a year, so I’m planning to make things with a bit of growing room and to suit a range of weather too. I’m hoping to be able to include a few quirky and unique touches like some of the animal inspired outfits I made in the past, but keep everything as interchangeable as possible.

Once the fabrics are finalised, it was time to think about patterns and quantities. I’m not sure yet if I will end up making everything or if I will supplement what I make with hand me downs, charity shop finds or even a few ready to wear pieces. The clothes will all get a lot more wear by keeping the number of items low, so they all need to be able to withstand lots of wearing and washing.

I decided that Toby probably needs:

  • 5 short sleeved t-shirts
  • 5 long sleeved t-shirts / lightweight jumpers
  • 2/3 warmer jumpers / hoodies
  • 5 pairs of trousers- 3 warmer, 2 lighter
  • 2/3 pairs of shorts

This should be enough to avoid washing every few days, but few enough that they should all be able to coordinate and also get worn regularly. To make it as simple as possible to get him dressed I’m going to keep the prints to the top half, so they can be layered up but should match with any of the shorts or trousers.

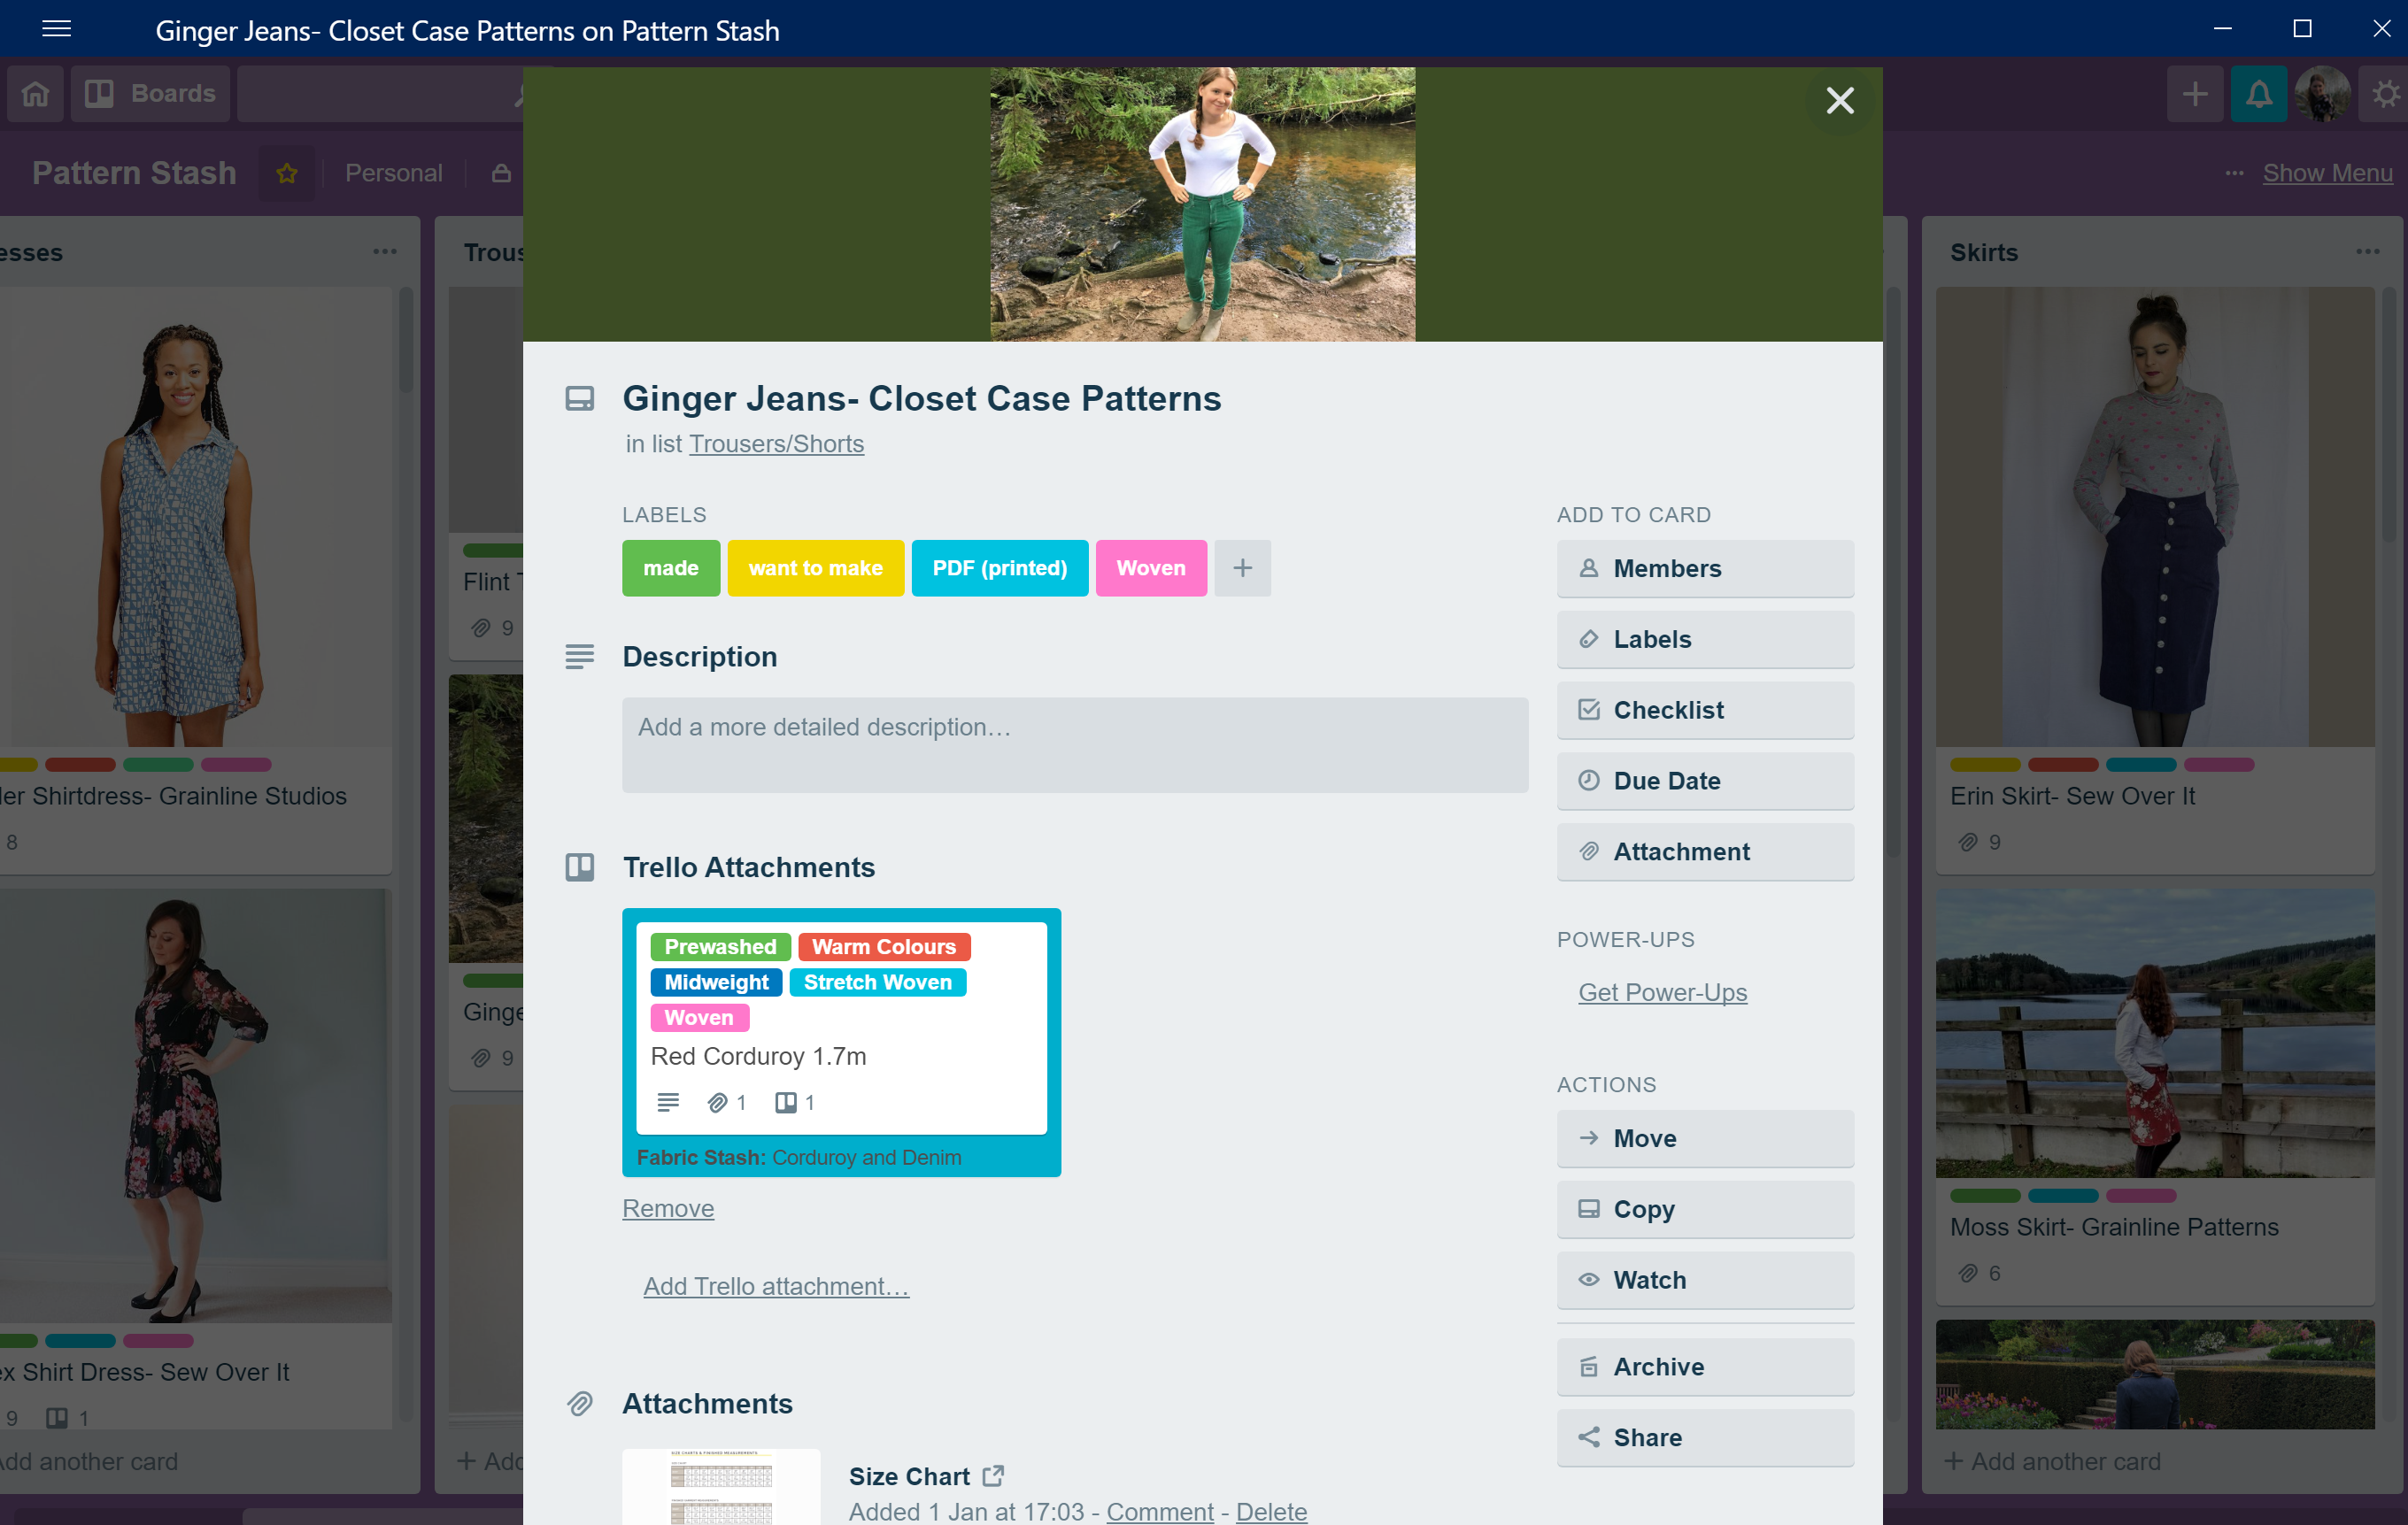
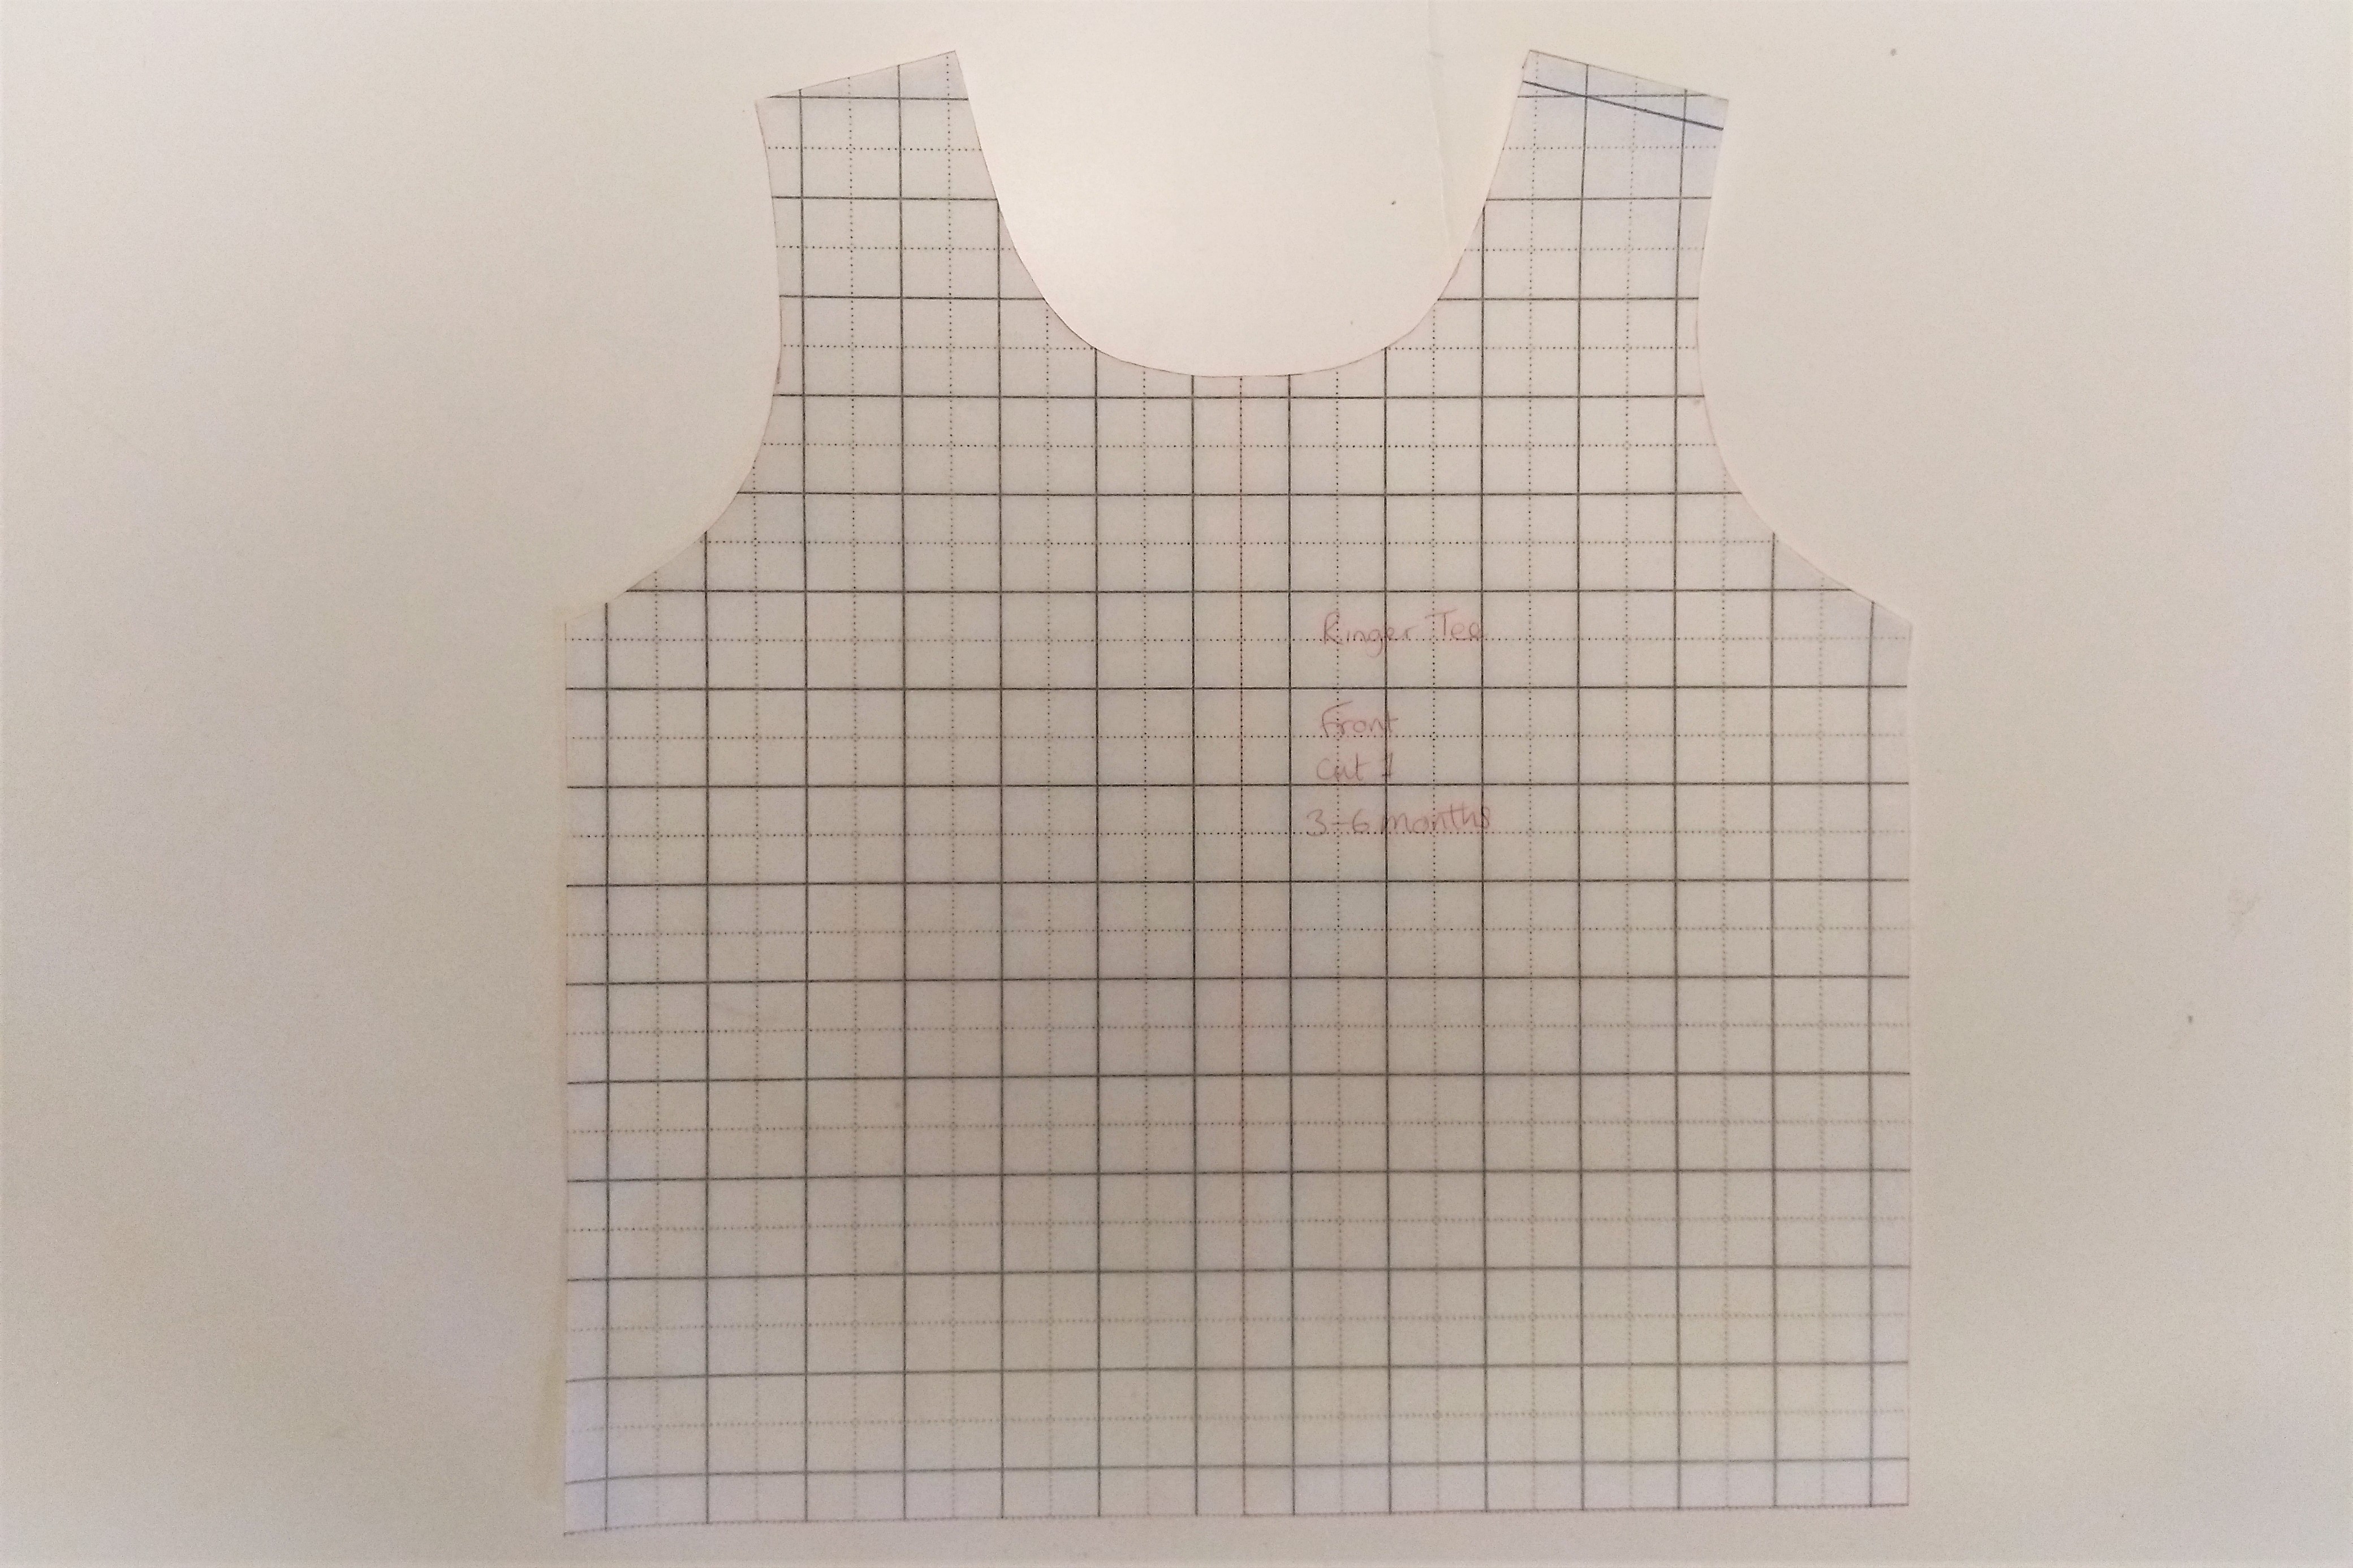
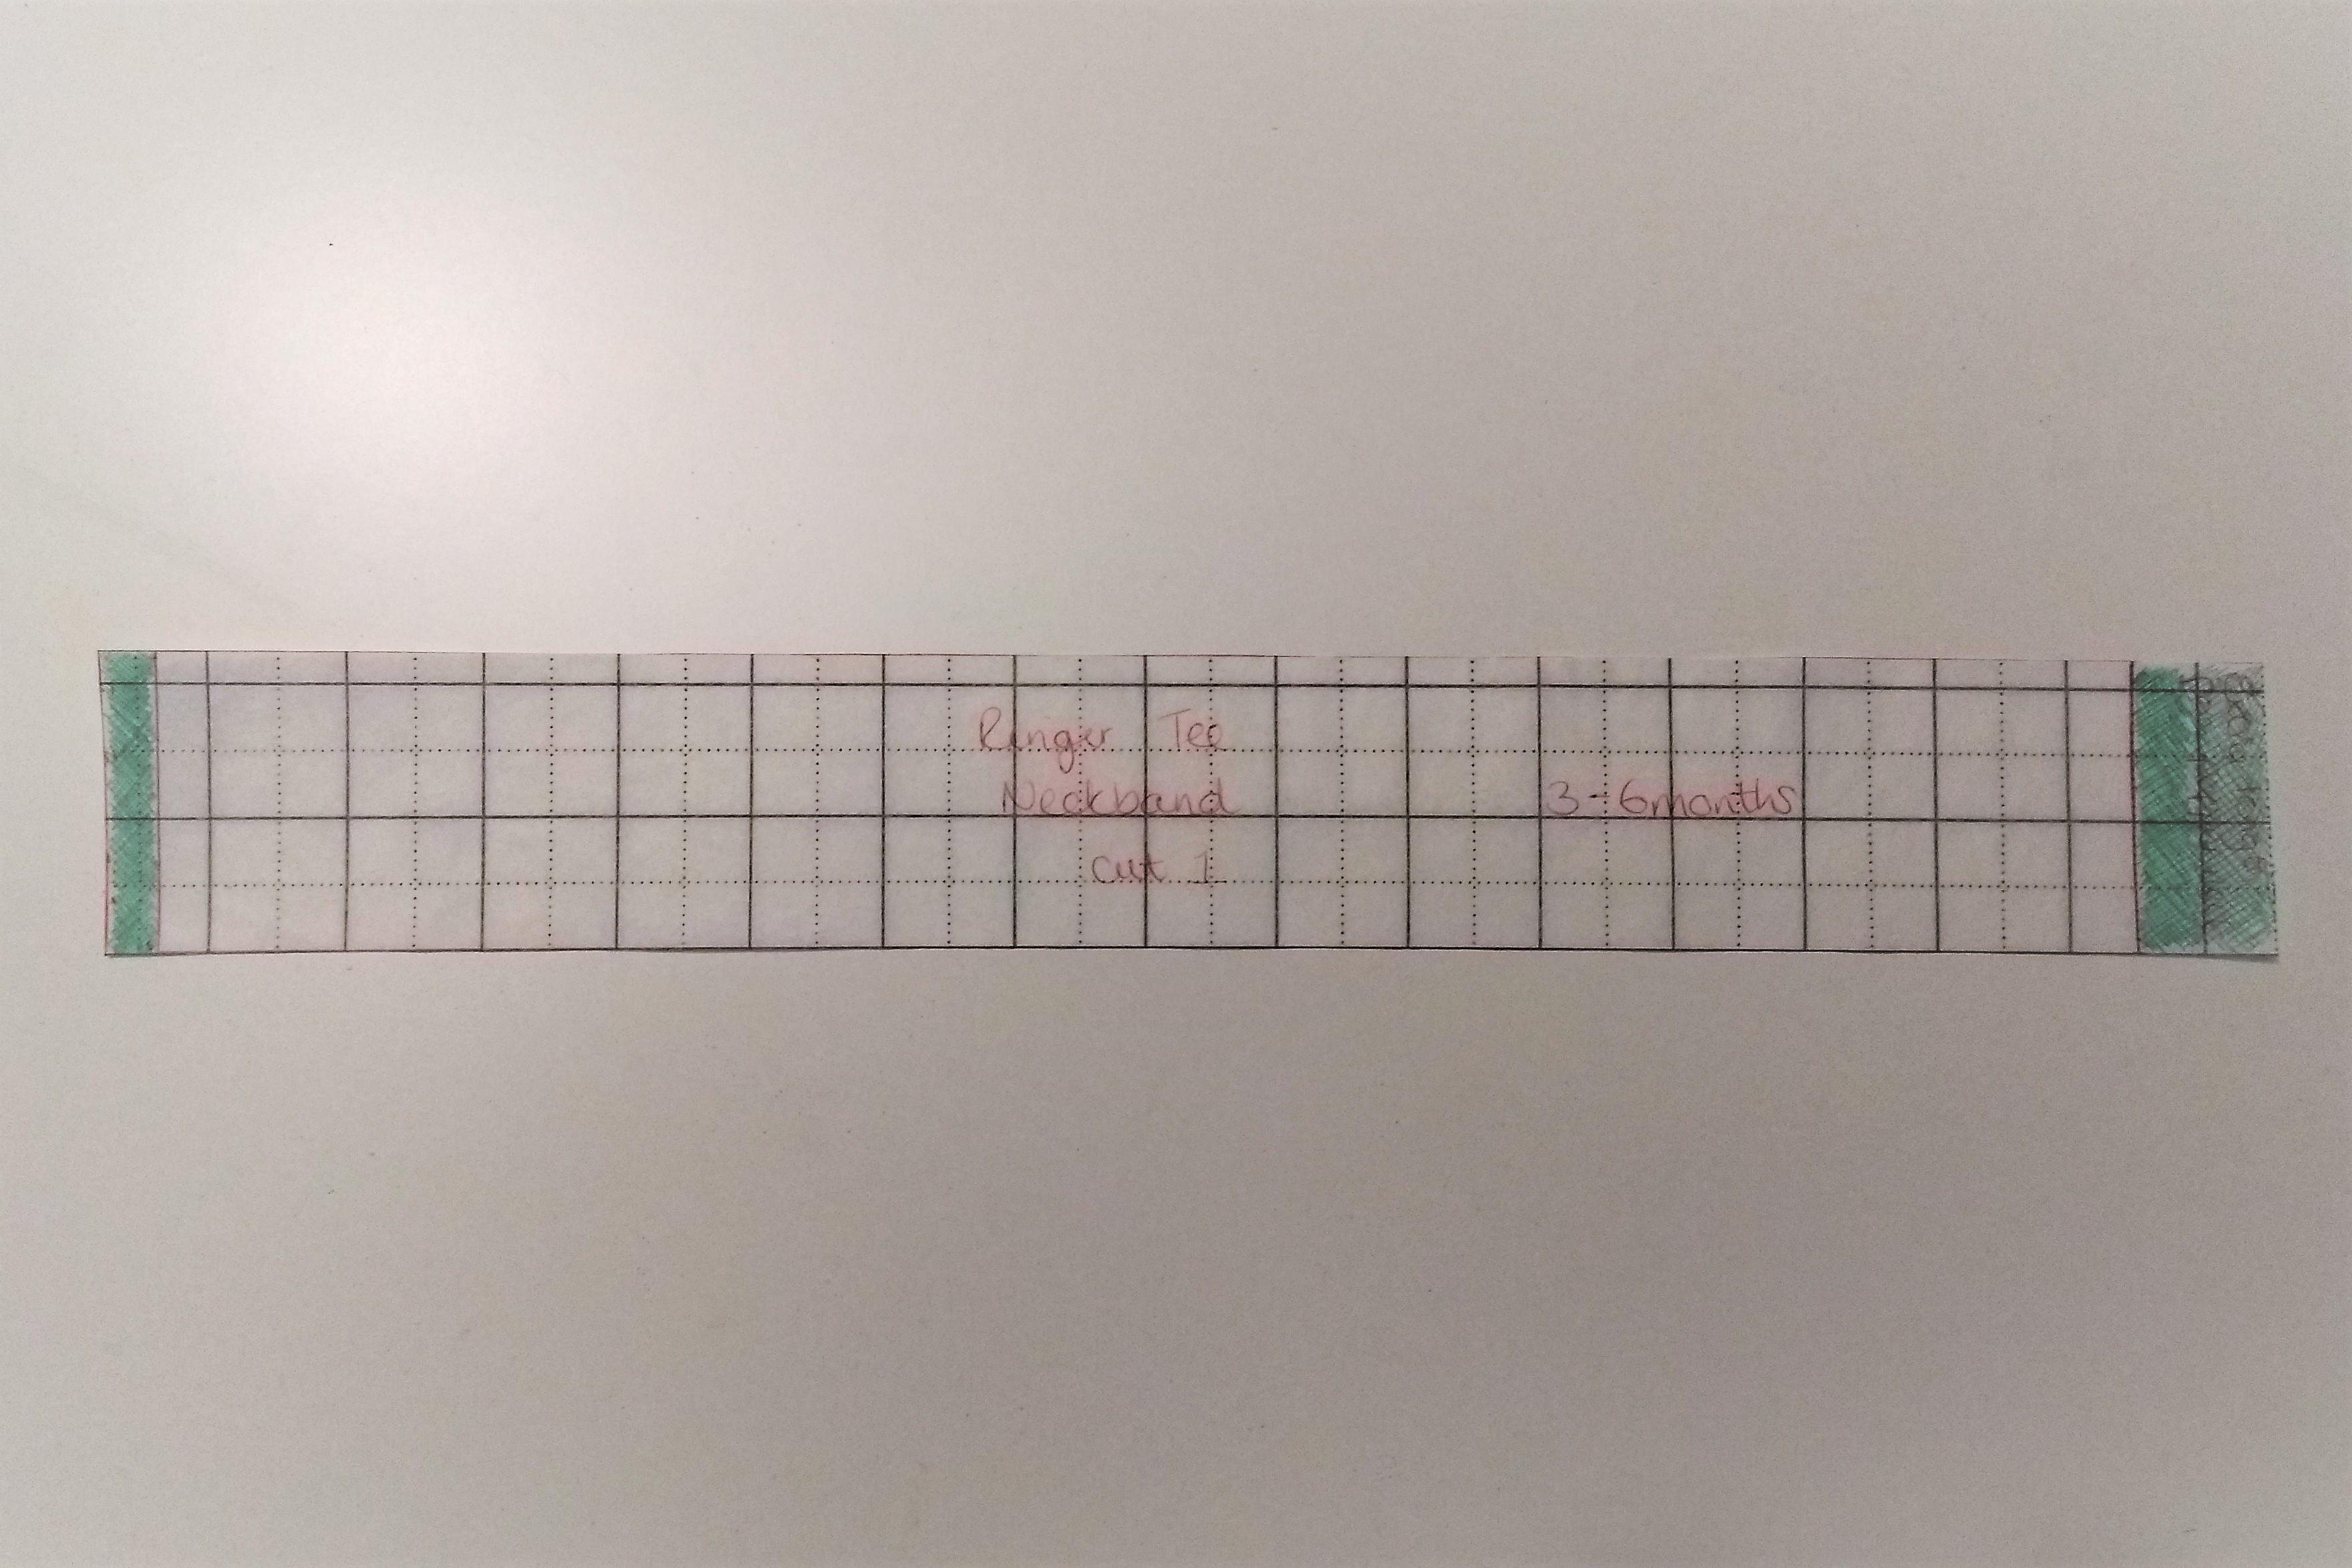
I already have a great selection of patterns to choose from, so I don’t think I’m going to look for any new ones particularly, unless I come across a real gap. Some of the ones that I’m already planning for are a zip hoodie, some joggers, ringer tees, and a yet to be blogged grow with me pattern. I’ve also bought a few other patterns recently so I’m looking forward to incorporating those too.

I’m really excited now about the prospect of creating a structured and cohesive set of clothing. Now I need to start pairing fabric to patterns and get started. A few of the items are already underway or completed so they will be appearing here shortly. I’ve also been planning something similar for Lottie (and got sucked down a fabric rabbit hole) so I’m quite excited about that too!

Baby mini capsule Part 1- Going Bananas

I’ve had a little bit of a splurge on a few new patterns because a couple of pattern companies have had release sales lately! It means I’ve done another batch cut and sew to create another little capsule wardrobe for Lottie and matching t-shirts for Toby too.

The whole outfit was inspired by these two banana prints that I bought a while ago in a sale at Fabric Godmother. Toby loves bananas, and it’s one the words that he uses often so he was very pleased to see this print.

Toby’s t-shirts are Brindille and Twig ringer tees. I’ve made him the next size up- 18-24 months. It’s a staple that I keep going back to! The fit is quite roomy which is useful when you know that. Toby is a chunky 22 months and still has plenty of growing room.

I made Lottie ringer tees to match, but with my snap neck hack. To go with them I’ve been testing out new patterns. First up is the Made By Jacks Mum pick n’mix bodysuit.

The pick n’mix has loads of options, including a t-shirt cut line and both ‘regular’ and ‘cloth bottom’ fit bodysuits. I’ve gone for the cloth fit, and the snap neckline. There is also an envelope or crew neck option.

I’ve always liked the idea of making bodysuits to go with handmade baby outfits, but I find it hard to justify spending time making something so basic and that can be bought so cheaply. This was a slightly fiddly make. I’m not 100% happy with the binding so I am wondering about doing it as a band in future instead.

On these bodysuits the side seam is sewn after the binding, so I’ve stitched the side seam allowance down with a few little stitches. It’s quite a common feature of shop bought bodysuits too.

The little offcuts from were great for creating a couple of little appliqués. I used bondaweb to fix them in place, and a fusible wash away stabiliser to stop anything from stretching as I sewed. This has been through the wash a couple of times and the stabiliser still hasn’t washed out completely, but it did make the sewing really easy.

I’m looking forward to showing you the next parts of this mini capsule. I have 3 more new to me patterns to share, some of which are about to become firm favourites!

Top tips for t-shirts

The last little while on the blog seems to have been taken over by baby clothes, but normal service is resumed today! I’ve been making a few more Megan Nielson Amber‘s, and being as this is a real tried and true pattern for me I thought I would share a few of the little tips and tricks that I have picked up in the course of making them. Some of this applies to most jersey top (or dress) patterns, and some is slightly more specific to the Amber. (I’ve already blogged t-shirts here, here and here, a dress, and a t-shirt hack)

This time I’ve made a dress and a couple of tops, all from cotton spandex jerseys from Girl Charlee. The dress is this lovely muted floral, with some of their solid cotton spandex for the modesty panel (I always keep a couple of colours in my stash for cuffs, and t-shirts). I’ve also made a short sleeve t-shirt version for now in this feather print, and a plain navy long sleeve for layering when the weather cools down. I plan to be wearing these for at least the next year or so during pregnancy and breastfeeding so I’m looking forward to having a few more options this time around.

My first deviation from the pattern is to stabilise the shoulders with some narrow ribbon. I do this to all the adult t-shirts or jersey dresses that I make whether or not it is included in the pattern instructions. The shoulder seam takes a lot of the weight of the rest of the garment, and over time that could stretch. Sewing some 5mm ribbon into the seam allowance before I start construction is a great way to help them look good for longer.

The Amber top has a lot of neckline to finish neatly before you can carry on with putting the whole bodice together, especially if you include the modesty panel. Some of the curves are quite tight, and the fabric has to stretch quite a bit to sit neatly. Before I sew these neckline edges, I always press and then fuse hemming web into them. It means that I don’t need any pins which makes the sewing up a doddle and the hemming web gives the neckline a bit of stability, preventing it from stretching out as you sew. I always buy 2cm wide hemming web and cut it into either halves or third widths depending on what I need. I’ve also never worried about finishing these edges on the overlocker because the jersey doesn’t fray, and the hemming web also helps to keep the possible curling up of edges under control. Most of my Amber’s have been worn and washed regularly over the last two years and the neckline still looks pristine on all of them.

On my first Amber, I decided to skip the instruction to baste the pleats and then baste to the waistband before overlocking or stitching properly and it nearly ended in disaster! There are quite a few fiddly layers to manoeuvre at the front of the bodice, and I managed to catch one of them in the overlocker knife. Fortunately it was only a little nick and was concealed in the layers, but now I always baste this step and I haven’t had any issues since.

This tip works for all jersey garments- if I am planning to finish the hems (sleeves or at the bottom) on the overlocker, I always do it before attaching them to the rest of the garment, and always before sewing the piece into a circle. It is so simple to overlock a straight edge, but a bit more fiddly to start and finish a circle neatly. You can also press a ‘memory hem’ at this stage too, which is just a fancy way of saying press the hem allowance up then unfold again before stitching. It makes hemming really easy because there is less fiddly pressing in a circle.

For sewing t-shirts I usually just use my overlocker for all the seams but I always need to stitch hems on the sewing machine. I use either an even zigzag (usually 2.5mm width 2.5mm length) or a twin needle. I don’t mind the look of either, so it often comes down to laziness in deciding to change needles and re-thread for the twin needle version!

If you don’t have two spools of the same thread for a hem, an easy fix is to load a bobbin with the same thread and use that in the second needle. Especially if I have been overlocking in white, I will often put white thread in my bobbin for the hem and use the coloured bobbin thread in the twin needle. It stops me having too many part-filled bobbins of odd colours. Here I used the end of a bobbin of dark blue thread which blended in with the overlocking.

So these are the finished Ambers. Right from the start of the year I left a planned wildcard but with thoughts of making a jersey dress in my make 9 so I’m counting this as another project ticked. These dresses really are so comfortable so I know this one will get plenty of wear, especially with leggings as the weather starts to cool. In this one the fabric does contain a bit of rayon which makes it a bit more drapey than all the other versions I have made. As a result the length seems to have grown a bit, so I’m not sure if it looks a bit nightdress-y? I might re-hem so that it sits above the knee like my other dress version.

With the white background and array of colours, this t-shirt feels bright and summery so it’s had some good outings already. It might not be quite the right thing over the winter, but I’m sure it will be worn plenty again in the spring.

Conversely, this navy blue one felt a bit dark and boring when I was sewing it up, but I know it’s moment is almost here. I love a good long sleeve for layering in winter so this will end up underneath all my dresses or even other t-shirts to make them more seasonally appropriate. This might be the most times that I have used any single pattern, so it has been a great value buy. What is your ‘can’t live without’ pattern?

Organising my fabric and patterns- digital edition!

Some time ago I wrote about how I organise and store my patterns and I thought it was time for an update. My physical storage of patterns hasn’t changed much. They still tend to be kept in plastic wallets, but I sometimes find that I am tempted by buying new patterns before really looking thought what I already have to see if there is something similar. I’m hoping that my new organisation will help put that tendency behind me!

Over the last few weeks I have been cataloguing my patterns digitally using Trello. Trello is a free app, and one of it’s big advantages is that is syncs between phone and computer. It has been a pretty mammoth effort to get most of my patterns on there, but it is nearly done, and I already love it!

That means I can input my patterns onto the computer using the bigger screen, but have all the information with me when I’m out and about. It also lets you add attachments, details and links to each entry so I even have all the correct information with me if I happen so stumble across fabric or notions for a project.

I am also aiming to sew from my stash fabrics as much as possible again this year, so I also decided to catalogue my fabrics in Trello. Now I can search through my fabric for things of a suitable weight, length or colour family without having to pull each piece of fabric out or unfold it to check I have enough. I’m hoping that it will make it easier to check if I have something suitable, before I resort to buying something new. I still have quite a bit further to go with this part, but I’ve resolved to catalogue one of my fabric boxes each week until it is done, and I recently had a clear out too of fabrics that I no longer love so my stash is definitely getting more focussed.

If you would like some more practical advice on actually setting something like this up, I used a tutorial by Helen of Helen’s Closet to get me started. It was really useful for deciding how to group fabric and patterns, and practically to start to see the scope of what is possible. I love that I can attach the cards for fabric to the pattern that I intend to use it for. No more buying fabric then having no idea why!

It was quite a commitment of data entry to get all my fabric and patterns listed, but it should be much easier now to look through and find what I want. I can check the fabric requirements for a pattern while I am out and about, or check to see if there is already a similar pattern or fabric before I buy something new.

Now it is started, it will be much easier to maintain as I go along too. I can archive fabrics as they are used, or change the dimensions that remain in my stash. There is something so satisfying about organisation for a new year!

Sewing when time is limited (or with a new baby)

It’s been a few months now since baby Toby arrived in our lives, so I’ve had some time to contemplate the changes that it has had on my sewing habits.  Gone are the whole days or evenings of sewing uninterrupted, and the sewing until the early hours to finish a project (sleep is too valuable now).  So here are my 5 top tips for sewing when your time is suddenly more limited.

1. Be realistic

When your life circumstances change, be that work, family or routine there are going to be changes to your sewing time too.  Having limited time doesn’t mean that you can’t continue to enjoy your hobbies, but you may have to change your expectations about what is possible.  You will probably enjoy the time that you do have more if you aren’t fretting about the things you can’t achieve any more, or the time you wish you had.  Be realistic about your life circumstances now, and choose projects accordingly.  I have been loving these baby feeding friendly tops (here and here) because they have been quick to sew, and get worn all the time because they meet the needs of my lifestyle as it is right now.

2. Make the most of short time slots

Toby is not a good daytime napper.  If I get 30 minutes during the day without a baby I feel like I’ve done pretty well.  To actually use that little time slot I have to plan ahead.

If I’m well planned, there are lots of ways that I can use that time productively, for example, reading through the next section of the instructions, pinning or pressing seams, or even a little hand sewing.  I sometimes manage to machine sew a little, but I tend not to because it’s not great if I have to stop midway through a seam to pick up a newly awake and crying baby!  with that in mind I always try to make sure that I’ve left myself a job to do which is easy to pick up and put down if I only get a few minutes at a time.

I try to keep things conveniently arranged too, with the equipment and materials that I need for the next stage all together and in easy reach.  If you have space, leaving the ironing board set up and ready to go makes the world of difference!  (See more pattern and sewing room organisation)

3. Choose fabric and patterns wisely

The first bit of sewing that I did post baby was a Sew Over It Lucia top and it was exactly what I needed- just 3 pattern pieces, and super simple and quick to sew.  The vast majority of the sewing that I have done since then has been well behaved jersey knits using familiar patterns.  I don’t have the patience of time for finicky, dainty fabric or complicated pattern fitting at the moment!

By choosing your fabric and patterns wisely you can maximise the parts of sewing which you enjoy, and minimise the difficulties.  I know that my least favorite part of sewing is the cutting out, so I have been mostly choosing to sew patterns which are either fairly quick to cut out because they have few pattern pieces, or fabrics which are easy to cut because they don’t shift around too much in the process.  You can also make both cutting and sewing easier by avoiding fabric which needs pattern matching (or taking a more laid back approach to it).

4. Batch sewing

More complicated sewing with more complex processes will necessitate more time reading and interpreting the instructions.  When you sew several versions of the same pattern simultaneously, you can maximise your time sewing compared to reading instructions and working out construction.  The second time completing each step is often much quicker than the first because you can dive in with confidence.

This doesn’t work for all projects, and is best for patterns with either a fairly forgiving fit, or which you already know fit well.  I often use this technique when sewing shirts such as these Archer Shirts from last summer.

Even more efficient is if the items that you are sewing are all in the same colour family, then you can keep switching between them without needing to change thread colours.

5. Enjoy the process, not just the end result

This tip is probably the most important.  I have come to terms with the fact that I am not going to sew so much as I did before.  I just have a lot less uninterrupted time, so even when I have a free weekend, chances are I won’t get much sewing done unless Toby is out on a walk with someone else, or asleep.  That actually makes the time that I do get to sew even more valuable though, because it is the opportunity that I get to relax, reset and do something for me.  That bit of downtime is my chance to recharge ready for the next challenge.

Tutorial: How to hack a t-shirt to have a popper closure

A couple of weeks ago I posted about my hack to the Brindle and Twig Ringer Tee pattern to give it a popper opening/closure and make it easier to get on and off.  I thought that I would put together a proper tutorial.  This method will work for any t-shirt pattern with a shoulder seam, and doesn’t have to be limited to just children’s clothing.  You could just as easily use the same method to add a fun feature to an adult jumper too.  I’m using the Ringer Tee pattern pieces again simply because it is a readily available and free pattern so any of you that want to give this a go, can!


Pattern modifications

Step 1:

The pieces that we are altering are the front, back, and the neckband.  You will first need to trace off new copies of these pieces in the relevant size.  Leave space around the pieces for the modifications.

The Ringer Tee has the front and back pattern pieces cut on the fold.  We are going to make the pattern asymmetrical, so you may find it easier to trace the pattern piece off complete so that it can be cut on a single layer.

Step 2:

Decide how much of an overlap you want at the closure.  I chose 1/2″ or 13mm.

I also decided that because it is a jersey pattern, and jersey does not fray I was happy to leave the inside edge raw or overlocked, rather than concealing the cut edge.

Step 3: Front Pattern Piece

You need to know what seam allowance the pattern you are working with uses.  The Ringer tee has 6mm seam allowances.

Draw the seam allowance on to one shoulder seam. (the blue line in the picture)

IMG_20180601_155622281

Draw on another line which is 13mm (or whatever overlap you decided on) from the seam line.  With my 6mm seam allowance this makes 7mm extra length in the shoulder.  This extra area is shaded in green.

Front, overlap

Step 4: Back Pattern Piece

Draw the seam line onto the same shoulder as you did for the front.  (It will look like the opposite shoulder because the pattern piece is effectively back-to-front.)  See the blue line below.

Back, seam line.jpg

Draw another line twice the overlap away from your seam line.  If you are using a 13mm overlap, this new line needs to be 26mm from the seam line.  The extra area is shaded in green again.

Back, overlap

Step 5: Neckband

Your neckband needs to have the total additional length added to it.  This means the length added beyond the seam line.  In my example that is 27mm.  (13+26-6-6=27mm)

IMG_20180601_155915939

Sewing up

Step 6: Cutting out and first shoulder seam

Cut out the pattern pieces.  Cut a tiny notch at the seam allowance line on the front and back shoulder on the side which was modified.  Sew the other shoulder seam (the one without the pattern alterations) as in the pattern instructions.  Press the seam to the back.

Step 7: Neckband

Fold and press the neckband in half.  Stitch it to the neckline.  Press the seam down towards the body of the top.  It should now look like this, with the neckline finished, and one shoulder open.

IMG_20180601_163958425

Step 8: Prepping second shoulder

Finish the shoulder seam allowances if you wish.  Press over 13mm on the front and back shoulder seams.  Use a strip of fusible hemming web to keep the fold in place while you complete the rest of the construction.

IMG_20180601_165411690

Step 9: Prepping the overlap

Overlap the back shoulder over the front, using the shoulder seam notches to align properly.  Use pins to keep the overlap in place.

IMG_20180601_165815259

Step 10: Sleeves

Insert the first sleeve, matching the shoulder notches to the central notch of the sleeve.  Once it is sewn, this will keep the overlap in place.

IMG_20180601_171202735

Insert the other sleeve.

IMG_20180601_172545779

Step 11: underarm and Side seams

Sew the underarm sleeve, and side seams together in one continuous seam.

IMG_20180601_173431545

Step 12: Cuffs and Waistband

Sew the short edges of the sleeve cuffs and waistband.  Press them in half wrong sides together.

IMG_20180601_173825285

Sew the waistband and sleeve cuffs to the body.

IMG_20180601_183520852

Step 13: Attach snaps to open shoulder

Attach snaps to the open shoulder seam, aligning the two halves.  I used two snaps on this 3-6 month size, but on larger sizes it might be better to use more.

You may wish to use jersey snaps like these which have multiple prongs because they are less likely to pull out with time and wear.  I generally use Prym vario pliers to apply snaps.  Much easier than all the hammering!

IMG_20180602_105640348

All finished and ready to wear!

IMG_20180602_105945588

Sashiko Mending Archer

This is my first ever Grainline Archer.  I have since shared a few more recent versions, but this first one has always been a favourite.  I meticulously pattern matched the plaid across the front, learned how to attach a collar and install plackets, and even inserted my first snaps.

wp_20160502_18_23_25_pro

Favorite, that is until a hole appeared right where the button placket meets the front piece.

IMG_0844.JPG

I deliberated for ages about what to do.  I didn’t want to just throw away something that represented a lot of hard work and some fairly major achievements, but I also didn’t know how to mend it in such a way that I would be happy with the end result.  And I really didn’t want to have to do loads of unpicking to sort it out!

IMG_0845.JPG

I have come across Sashiko a few times before, often as a piece of decorative art, or sometimes as a means of mending the knees of worn jeans, but only recently did it occur to me that this might be the way to salvage my much loved shirt!  I did still have some of the fabric from the original shirt left, so this felt like a logical place to begin my mending journey.  I took a large rectangle, overlocked all the edges and pinned it in place behind the hole.

Next I chose a complimentary embroidery thread.  I wanted something that toned in with the colours in the shirt, but I also wanted to embrace the fact that this mending was going to be visible, and I could be proud of that!  This seemed like a good compromise.

IMG_0847.JPG

Because the shirt already has such a strong geometric pattern, I decided that there was no need for complex embroidery shapes.  Sticking with the grid of the plaid would help keep my stitches even and straight anyway so no need for guide lines.

IMG_0848.JPG

Sashiko mending is designed to reinforce the fabric, anchoring it to a solid base, but I think I may still have to be a little careful when using the poppers that I don’t put unnecessary strain on the fabric.  I think it looks pretty cool, and now I can wear my Archer shirt again with pride, knowing that it is even more unique and special than before.  Embrace the uniqueness and the mending.

IMG_0850

Wise up Wednesdays: Matching fabric to your pattern

Many patterns give suggestions of the types of fabric which might be suitable.  But how do you know if you could substitute something else (perhaps something special from your stash) if it isn’t listed in the suggestions.  There may be times when you can deviate from the pattern suggestions and end up with an even more special garment, personalised to you.

If this is something you are thinking about, here are my thoughts and process for deciding if a fabric will be suitable for the project I have in mind.

  • How similar is your chosen fabric to the suggestions?

If you are substituting one fabric for another similar one then you will probably be fine without making any modifications.  For example, using an upholstery weight cotton for a skirt pattern which suggests denim, cotton twill or corduroy.  Here all the fabrics are all woven and of similar weight and drape, so there will not be any real change to how the pattern fits or is constructed.

IMG_0959

However, if you wanted to make the same skirt in a lightweight cotton lawn, this is significantly lighter than the pattern suggestions.  To get the same effect, you may need to line or interline your fabric, and consider adding interfacing to keep the structure of your garment.

IMG_2264

In making my K4015 coat (which will be revealed on Sunday) the fabric recommendations include double-sided pre-quilted fabrics, laminated fabrics, or water repellent fabrics. I chose to ignore them and made my coat in a wool/acrylic blend with no changes to the pattern, because I was ok with my coat being a little sloucher than the pattern samples.

IMG_0411

What if you want to make bigger changes though?  Keep reading on for my thoughts!

  • Woven or Knit?

What qualities does you pattern require.  One of the first decisions might be about stretch- how much do you need to make the pattern work and how will you get the item on and off if previously it relied on stretch rather than fastenings.  My Rowan bodysuit needed fabric with stretch in both directions to help get it on, off and to fit.  Many jersey or knit patterns need stretch to fit the neckline over your head.  Substituting for something with less stretch may mean you can’t even get your new outfit on, let alone move in it!

IMG_0108

Modifying a jersey pattern to a woven is not terribly common, partially because many jersey or knit patterns rely on negative ease to fit, meaning that the finished measurements are actually smaller than the body measurements.  This is fine when your fabric has stretch, but patterns for woven fabrics need to include ‘ease’ or a bit of extra space for you to move, breathe and take it on and off.  Melly at Melly Sews has a good set of questions and considerations that you may need to think through when changing your fabric from the pattern suggestions.

If you are planning on making a woven pattern in a knit fabric you may need to make a few pattern modifications, such as sizing down, removing fastenings/zips and switching out facings for bands at the neck or sleeves.  It does depend though on what type of knit fabric you use.  A Ponte de Roma or scuba doesn’t usually have a huge amount of stretch, nd is pretty stable so may not need huge modifications. Tilly at Tilly and the Buttons does have two blog posts talking about adapting woven patterns for knits.  One is all about using Ponte and the other talks about modifying a pattern for a lighter weight jersey.  I would say, that for both of these options, the key to success is actually looking at qualities of the pattern you are going to sew, which brings me neatly onto my next consideration.

  • Drape or Structure?

Another consideration is how should the fabric move? Should it be fluid and drapey, or does it need structure and weight to hold the shape of the pattern?  This is something which I do struggle with from time to time.  My basics pocket skirt was made with a linen, but unlike the light linens in the samples, mine was a bit stiff and heavy.  This means that my finished skirt is a bit more structured than it should be. I’m still hoping that as it keeps getting washed it will soften up, but this is an example of not quite matching the requirements to the desired end resultIMG_1787

I now try to think through what is the shape of the garment? Will it be close fitting or will it need to skim over my body? This has helped my more recent projects to meet their intended purpose.  There is no point in dreaming up a flowing evening gown if the fabric that it is constructed in is too stiff to move and drape.

  • Print or Plain?

The other major consideration in my mind is about balancing the desire for lovely printed fabric, with the practicality of solid colours.  When I first stated sewing I was enticed by every cute print going, but they were hard to pair into my wardrobe because they didn’t go with anything.  In the last year, I have been more disciplined in thinking about what do I need.  Do I need another printed skirt, or is a plain t-shirt actually what is missing from my wardrobe.  If you are struggling t=with style considerations like these then perhaps the Colette Wardrobe Architect project posts might be useful in defining your style and what you want to wear and sew.  I am contemplating going through these posts for myself on the blog, so let me know if that is something you would be interested in reading.

IMG_2884 (2)

So I hope that has been helpful in considering what fabric to use for your next project.  Feel free to break the ‘rules’ though. Sewing is also about creativity and problem solving so go your own way if that is what you like.  Look back in next week for some thoughts on prewashing fabric ready for sewing.


Wise up Wednesdays: Collecting fabric and notions

Following on from my post last week, I am planning to elaborate on each of the parts of sewing preparation.  Here is part 1, and the process that I follow.

Have a look through the first part of the pattern.  Usually early on in the instructions there will be a list of notions and fabric required for your project.  Have a read through, and make sure you know what everything is.  Google can be your friend here if you need help!

IMG_1972

Have a look at the sizing too, and check that when you go fabric shopping you buy enough for the size you plan to make.  Many patterns give fabric recommendations, and while you don’t have to follow these, think about the qualities that you want you finished garment to have and try to match this to your fabric choice.  I will cover this in more detail next week.  If you have one, don’t forget to check in your fabric stash too.  You might find that you have the perfect fabric already there for ‘free’.

WP_20170803_12_14_42_Pro

If you need to, make sure that your fabric is prewashed, and pressed and we will talk a little more about how to decide and how to prewash fabric in future weeks too.

As mentioned in my pattern storage blog post, I like to store any notions (and fabric which is small enough) with my pattern in plastic popper wallets.  You know then that when you come to sew, everything will be there ready for you with no rummaging around in other boxes or pots.

IMG_1971

On more complicated patterns, I like to tick everything off as I get it together.  There is nothing more frustrating than getting halfway through the sewing and then discovering that you have missed something essential.  Running out to buy extra elastic or thread halfway through does not make for a relaxing sew.

They say that prior preparation prevents poor performance, and setting up right helps the sewing process to be more fun!

IMG_1919


Wise up Wednesdays: How do I start a sewing project?

Have you ever sat down to start a sewing project, turned on your machine, and then discovered that there is no way this is going to work?  You’ve failed to cut out one of the pattern pieces, and there is no more of that fabric? You didn’t check your collection of zips and now you don’t have one of the right length? Or the thread that you thought was sat waiting for you ran out on your last project?

Sound familiar?  The time you spend preparing for a project can save you so much time in the long run.  These are my top tips for preparing to sew.  I’m going to be putting together more in depth posts on each of them in the next few weeks.

  1. Prewash your stash (and your new purchases too)
  2. Read through the fabric and notion requirements (and tick them off when you have them assembled)
  3. Match your fabric choice to your pattern.  Does the pattern need drape or structure, woven or knit?
  4. Cut out your pattern pieces, leave them labelled and tick them off the pattern guide.
  5. Skim through the pattern instructions and make sure you understand any new techniques. Practice if required!